|
|
Post by JerryScript on Jan 24, 2015 19:11:59 GMT -5
Finishing up today. Started out wet sanding with 2000 grit sandpaper wrapped around a sponge. For anyone trying this instead of just being happy with the clear coat, what you are attempting to do is scruff up your nice shiny surface. You use 2000 grit because you don't want to see the scratch marks. The uneven surface will show you where you need to sand more, anything that has shiny specks means there are small dips that you haven't sanded down to, so keep sanding in that area till it's foggy all over (counter-intuitive I know, scruffing up to get a shine). Here's the progression from orange peel and fisheye to mostly smooth: First wet-sanding, then clean off and look for shiny spots and specks: 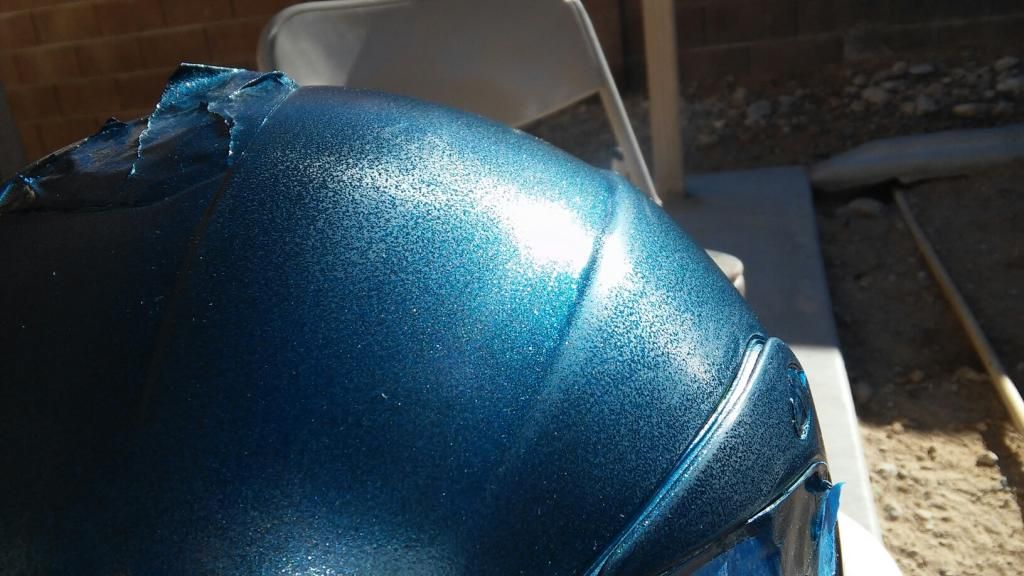 Getting closer: 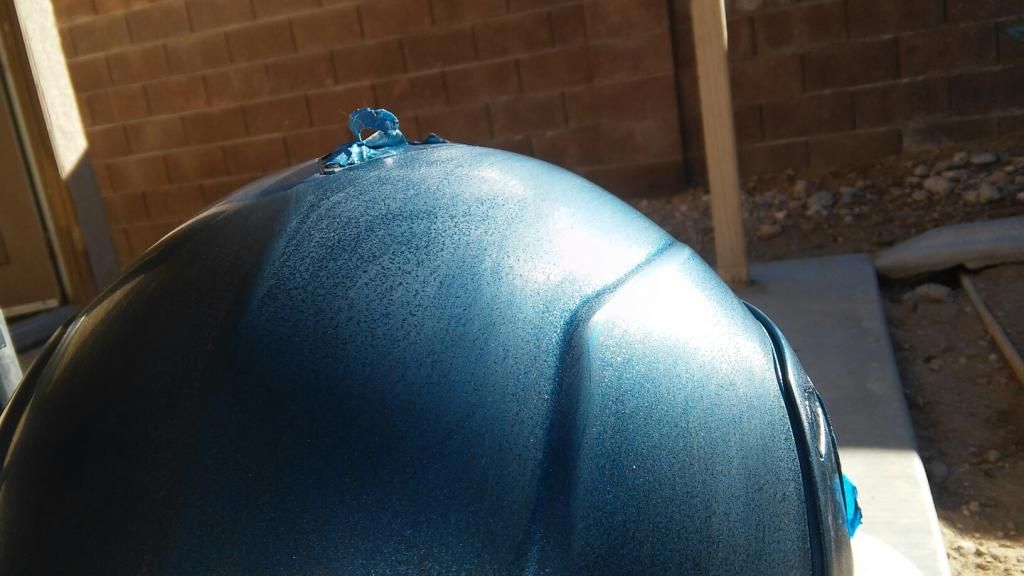 Almost there: 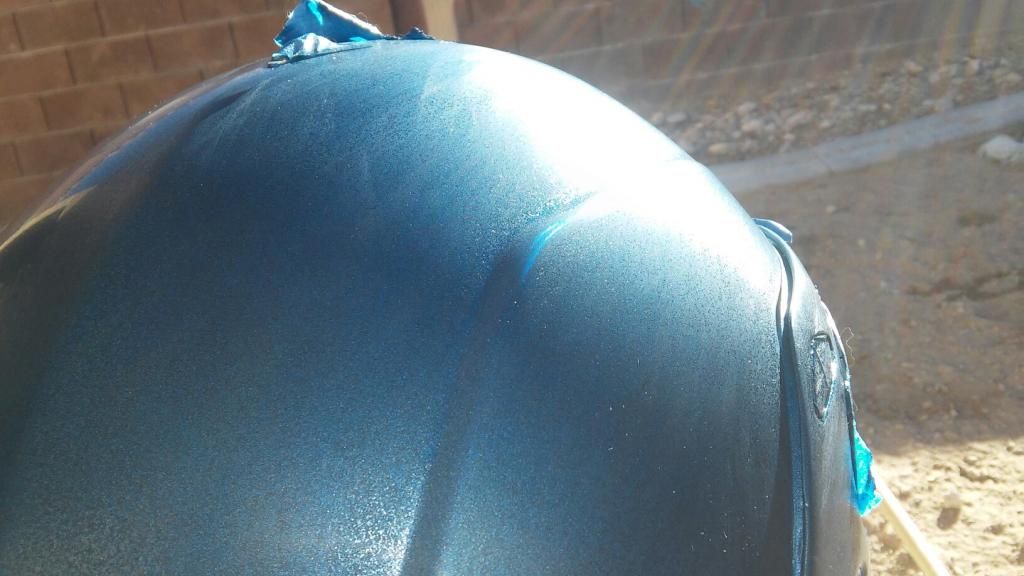 Next, I used Turtle Wax medium to fine polishing compound. Using a wet cloth, applying the polish generously, using a lot of elbow grease to really work it in, then buffing off with a soft dry cloth. After about a half hour, I'm starting to get a nice shine: 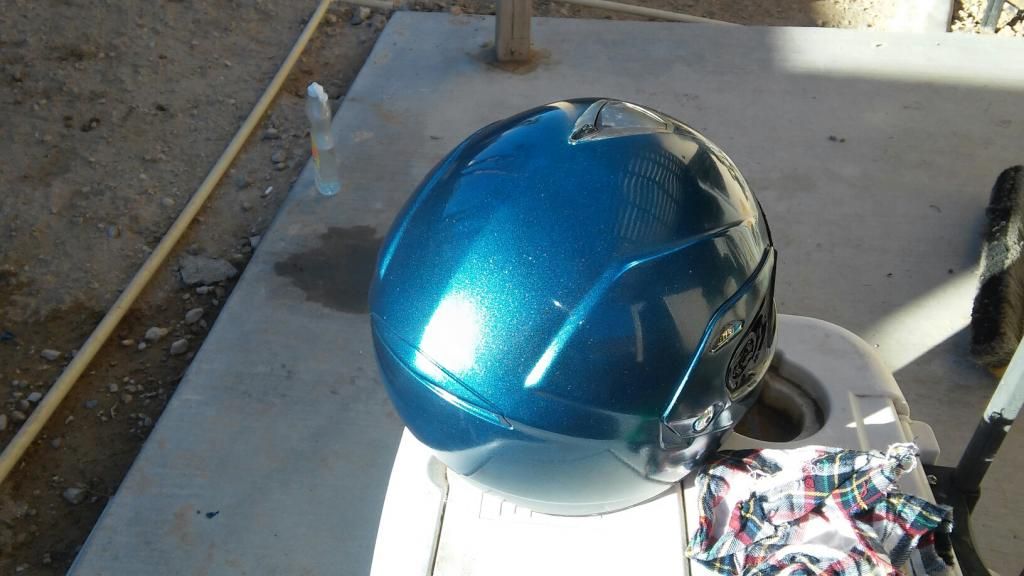 I don't have a buffer pad, if I did I could use even finer polishing compound to really bring out the shine, but I'm happy with what I have now. Just need to touch up some spots where the taping tore the paint and/or overlapped an area, thinking I may just use fingernail polish in some of those spots. Here it is all shined up next to the scooter: 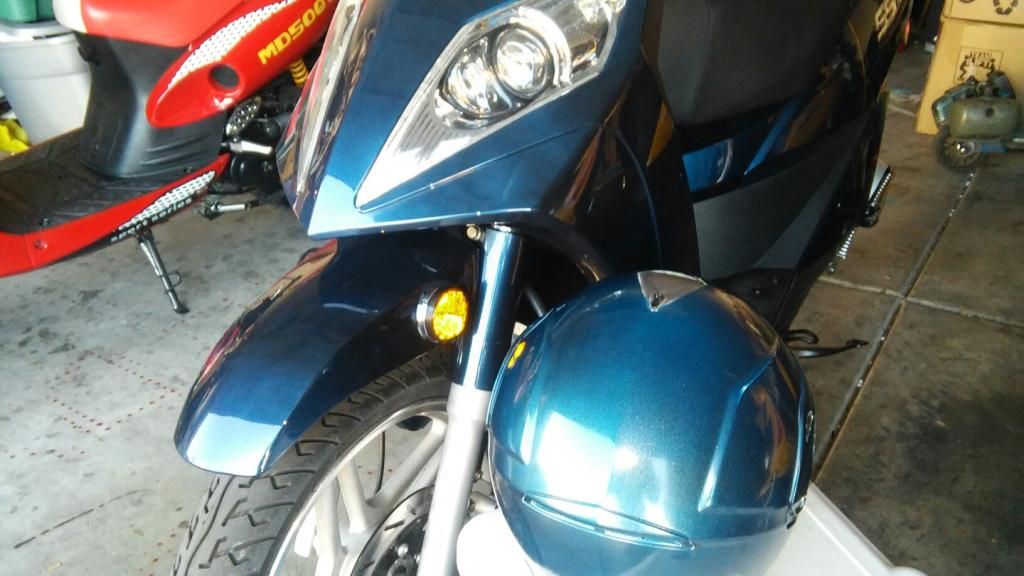 Here is a short video that show how close I was able to match the metallic look of the scooter's paint job: Final thoughts on this project: I saved around $200 for a professional paint job or a new helmet. I spent about 6 hours total working on it, 2 hours painting (not including waiting times for drying), and 4 hours sanding and prepping. Due to drying times, I was without this helmet for 3 full days, I do have an old black spare I've been using, but keep this in mind if you want to do something similar. Take your time, more light coats will always turn out better than fewer heavy coats. Watch online videos showing you how to do the various steps, and you will be surprised how nice your self painted helmet can look!  |
|
|
|
Post by JerryScript on Jan 24, 2015 15:45:11 GMT -5
I have the BN139QMB, it has standard stud spacing, but has the taller head with valves that are 3mm taller requiring a different set of rocker arms (found out last month when I did a head swap on the side of the road).
There is a 16" wheeled 50cc, though I haven't found a source for new ones in the US, I think they were last sold in the US pre-2010, and I have no idea what the engine stamp says. There is a forum member here that owns The Tomos Twister, which is one 16" 50cc model, and most likely has a different engine, I don't think the standard long case can handle 16" wheels. I can't think of the member's name, but I will keep a look out for his avatar which is a pic of his Tomos Twister, and I'll PM to ask about the engine stamp.
|
|
|
|
Post by JerryScript on Jan 24, 2015 15:40:27 GMT -5
Sweet custom build! You could create a fake engine enclosure under the tank to act as storage, and make it look even more like a motorcycle. Please let us know how the tank mounting works out, that cross member is going to take a lot of force when the scooter flexes.
|
|
|
|
Post by JerryScript on Jan 24, 2015 15:36:37 GMT -5
Hmmmm, it's relatively easy to bend pipe in a shop. It shouldn't be too hard to find examples of most stock headers and duplicate the bends for each model. Seems like a pretty low-cost low-risk proposition for someone with a shop to make some money on large ID headers for scooters.
Once again, the main issue is the end user being able to identify his/her scooter properly to make certain they get the correct header. I wonder if there is a simple universal adapter to mount headers to mufflers, with today's tech, it shouldn't always require a weld, gotta be a tape/resin solution out there.
|
|
|
|
Post by JerryScript on Jan 24, 2015 15:29:08 GMT -5
I finally installed a windshield from Scrappy today. Hopefully will help to make my cold weather riding a bit more pleasant! I have Scrappy's universal windshield, makes all the difference in the world. Easy to remove for the summer and replace for the winter, just two nuts to remove/re-install it if you leave the brackets on the rear view mirror mounts like I do. |
|
|
|
Post by JerryScript on Jan 24, 2015 13:28:03 GMT -5
Stay strong for the rest of your family, we will all be thinking of your father.
|
|
|
|
Post by JerryScript on Jan 24, 2015 13:21:00 GMT -5
It looks really nice, Jerry. You've done a good job on it. Once you start going around with it, you might get offers to paint other folks' helmets! However, I just have never understood the need for gear and bike to match. I've seen CL ads where someone is selling all their gear, often almost unused, because they got a new bike and it doesn't match. So? I never wore greenish stuff to match my old Taurus, and I'm not getting new silver/grey coats to match the hatchwagon. And as you can tell from my avatar, my pink jacket doesn't match my orangey-red scoot. Nor the silver helmet. Next helmet I'll look for a modular in neon. I'm not ragging on you, Jerry. I just want to understand why folks feel the need to match their ride. >'Kat Thanks! I now understand why it's so expensive to have a helmet painted professionally, the time alone makes it labor expensive, and to get a truly professional look, the right equipment helps alot! Actually, I would think a silver helmet would go together with a red scooter nicely. I'm sure your style looks just fine! I just couldn't take the safety yellow anymore. It's a large helmet, and with the safety yellow, I got more than one comment about looking like Dark Helmet from the movie Space Balls. I would have been happy with many other colors, and the safety yellow was an ok match to the yellow of my 50cc. But you have to admit, a big old safety yellow helmet on a very nicely painted metallic flake scooter just doesn't look right, looks like a dollup of custard squeezing out the top of a blueberry eclair!  |
|
|
|
Post by JerryScript on Jan 24, 2015 6:49:14 GMT -5
Yep, there is no replacement for displacement! Glad you are enjoying your new ride!
|
|
|
|
Post by JerryScript on Jan 24, 2015 6:46:30 GMT -5
I would try a steel brush wheel on a dremel, but your idea for the sandpaper should work. Be sure to wear gloves or hold the paper with pliers. You should change the valve stem seal on the exhaust while you're at it, it's probably pretty worn from those deposits.
|
|
|
|
Post by JerryScript on Jan 23, 2015 22:34:56 GMT -5
After sitting outdoors for 4 months, parts of the fuel could have gelled up and clogged one or more of the carb ports. Take the carb off and clean it really well. Go on youtube for videos showing you how to disassemble it and where the ports are you need to spray the carb cleaner in. Let us know if that helps, if not we'll move on to the next thing to check, spark/compression.
|
|
|
|
Post by JerryScript on Jan 23, 2015 19:50:07 GMT -5
...Taotao sent me two new ones for free,,they look a little better but I probably wont use them. That's impressive. I didn't know TaoTao had a service department that took care of things like this after the sale. |
|
|
|
Post by JerryScript on Jan 23, 2015 18:26:57 GMT -5
|
|
|
|
Post by JerryScript on Jan 23, 2015 17:48:24 GMT -5
Thanks! Color is pretty close, the camera doesn't make it obvious, but it is at least a shade lighter. If I did it over, I would have used a black primer, and perhaps a darker shade of blue, but I was limited to what Pep Boys had in stock. I used Dupli-Color for the primer and two paints, and I had an old can of cheap lacquer clear coat I had used on a cabinet refinish. The temps gave the clear coat a lot of fisheye, so I have a lot of wet sanding and polishing ahead of me.
|
|
|
|
Post by JerryScript on Jan 23, 2015 16:00:53 GMT -5
Added 6 very light coats of clear lacquer this morning. Temps were a bit cold, so I got more fisheye than I expected. Got a lot of wet sanding to look forward to tomorrow before polishing. Here's a pic of the helmet with the scooter, it's a tad lighter, but I'm pretty happy with it: 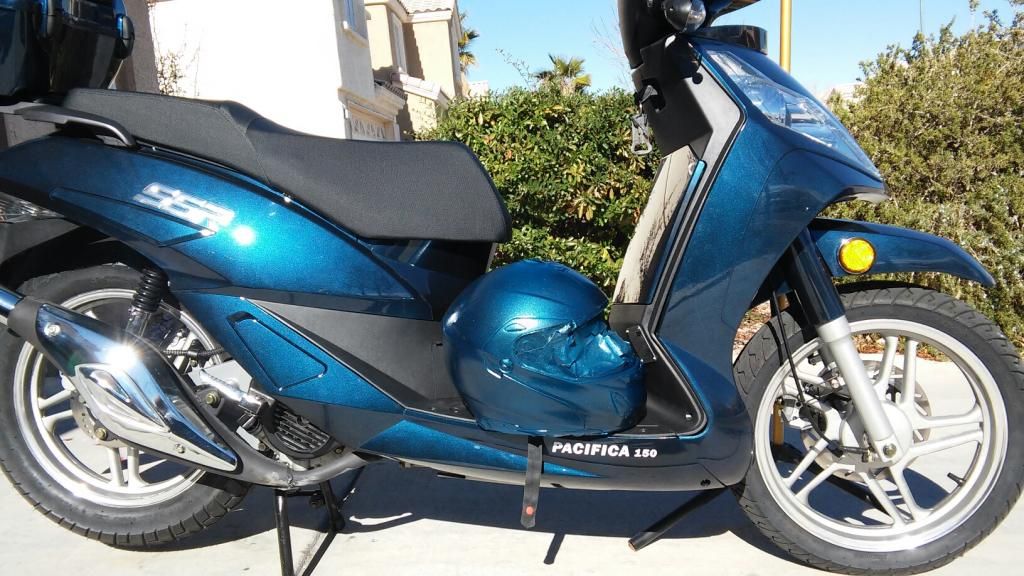 I would try wet sanding and polishing tonite, but with the low temps, I think it's best to let it cure overnight first. |
|
|
|
Post by JerryScript on Jan 23, 2015 14:14:16 GMT -5
Another thing to consider is hand guards, they make a huge difference, and can be removed easily during the summer. Just be sure they will fit around your brake handles. I bought a pair of black plastic handguards off Ebay last year for $5, didn't fit my scooter but did fit my nephew's, and he loves them!
|
|
