|
|
Post by toddmaples on Nov 13, 2014 12:37:59 GMT -5
Just FYI - There is no such thing as a 100cc BBK for a 50cc scooter. The ones advertised as 100cc are actually around 83cc. Not sure why they continue to advertise them as 100cc, they have been doing so for years. I guess no one has complained to the authorities about false advertising due to the fact that putting a BBK on a 50cc without licensing it is in fact illegal in every state. Truth, even with a stroker crank, still isn't quite 100cc. |
|
|
|
Post by toddmaples on Nov 13, 2014 10:23:58 GMT -5
Hope everything goes good , keep us posted got the piston and jug in las night after fighting the rings cause I couldn't find my ring presser. Today should see first fire for this new engine, if its warm enough out to work on it, cold snap coming through this weekend :-( |
|
|
|
Post by toddmaples on Nov 13, 2014 9:26:43 GMT -5
OK mabye I will wait on the BBK and just do other things to try to get the speed up. Thanks man No problem, just trying to save you hassle. I did run mine with a 70-75cc kit for over 8000km with no problems, but the 100cc kit spun crank bearings after only 1000km. |
|
|
|
Post by toddmaples on Nov 13, 2014 6:54:54 GMT -5
Hey everybody I am looking to buy a 100cc big bore kit for my taotao atm50a1. What is the best 100cc BBK you all would recommend. Also what carb would go best with the new BBK. I still have the stock carb. I am also planning to buy new a performance variator, performance clutch, new clutch spring (not sure which size. I need to get up hills, and take off fairly quickly, what other upgrades would you recommend. If this bike is going to be a daily driver you may want to reconsider your piston/jug choice. 100cc kits on these taotao atm50a1's do not last long due to heat and unbalanced crank rotation. You will either overheat and warp vital components (like the piston/rings) or spin crank bearings. If you plan on a stroker crank For this engine the failure probability will be reduced, but by how much I cannot say. |
|
|
|
Post by toddmaples on Nov 13, 2014 6:46:57 GMT -5
Would any of the technigas exhausts fit on my tao tao atm50a1 Any exhaust that fits the 1p39qmb engine will fit. I have a scrappydogs stainless exhaust setup on mine. Don't forget to brace the muffler As the header alone will NOT hold for long... going down the road at 45 and loosing your muffler and flange isn't fun. |
|
|
|
Post by toddmaples on Nov 11, 2014 7:49:37 GMT -5
Get the 58.6 bbk " from gy6racingteam" on eBay . Next get a 58.5 head " I got the ncy racing head " . Get an eBay exhaust " some are good others are not so good , just do some research with us . Next if you want more hp don't get any smaller than a 28mm carb . The gains others have had with the 30 and 28mm carbs have been great . I use a 32mm carb and a 125 main jet . And of course you will want a uni filter . You may be able to do all of this for 300 bucks . 430$ from scrappy dog netted me intake and exhaust setup, bbk, and a few other misc parts. Cvt is already maxed out with larger variator, torque sheave, clutch, and performance bell. I'm hoping to be able to get accurate 65Mph outta her. Install will begin today or tomorrow, whenever I have free time. |
|
|
|
Post by toddmaples on Nov 10, 2014 15:21:05 GMT -5
I have a 2013 Taotao thunder 50, does the emission control stuff on the bike take away power? If so would it hurt to remove it? Also, this engine performs a lot different than my old scooter that has the same engine in it. This new one barely reaches 35mph my old one will go almost 45 the new one just sounds like it has no guts at all Sent from my LG Optimus G Pro Around 2012-2013 taotao accidently put 63cc engines in some scoots. Only way to know is measure the jug. I had one of these "secret 63's", and stock it was crappy. Pulled emissions, upgraded Carb and exhaust, cvt tune, then it was a respectable bike... |
|
|
|
Post by toddmaples on Nov 10, 2014 10:27:32 GMT -5
Some "gates" belts are cheap Chinese knockoffs. Jus'sayin.
|
|
|
|
Post by toddmaples on Nov 7, 2014 14:06:50 GMT -5
hey guys so this problem is repeatable and it only happens at rpms over 7k its kind of hard to describe but the easiest description i can come up with is the scoot looses all power at high rpms and will bog when i give it gas when this happens, i have to go down to idle (if it doesnt stall) for a couple secs then the problem fixes itself. it doesnt feel like anything major is happening (like nothing is breaking) if you guys want i can probably make a video of it happening if you guys want to hear whats going on. and btw the 115 jet isnt rich did a spark plug chop and the color on the base of the ceramic is a lite smoke/tan color however i do get pops when letting off the gas at rpms over 6k which im sure is a lean condition so that could mean i just need to richen up the a/f ratio? Maybe vacuum loss is a factor. Straight line your fuel line To the Carb and try that. Don't forget the cutoff valve... |
|
|
|
Post by toddmaples on Nov 4, 2014 7:40:05 GMT -5
I have and have used it . The one I have is a little different . It's tricky at best to use . John Would it be easier to split the case and grind on it if I'm already installing a stroker crank? |
|
|
|
Post by toddmaples on Nov 3, 2014 14:40:29 GMT -5
Mods, move to tech section please?
|
|
|
|
Post by toddmaples on Nov 2, 2014 13:20:32 GMT -5
If you have stripped an exhaust stud hole, here is the quickest and easiest method I have found to fix it. This technique is also a must for anyone that will be pulling their exhaust often. You will need the following materials: -Head gasket -Drill -Drill bits -EZ-Lok inserts sized for application (Available through Grainger) -Tap set sized for inserts -Vice/Workbench  The first step is getting the head off of the engine. This can be done with the engine still inside the frame fairly easily. Once you get the head off the engine you can back the old studs out using the jamb nut method. 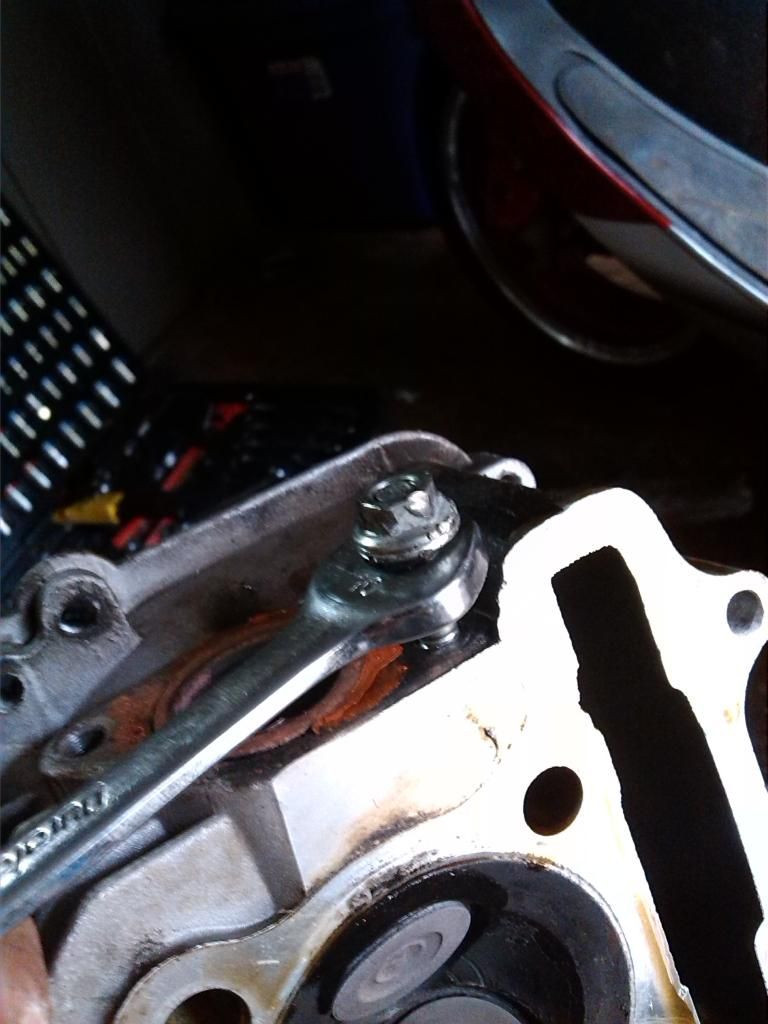 Once the studs are out of the way you can begin drilling. Take care not to drill too deep. I usually drill about 1/16"-1/8" deeper than the height of the insert for a flush mount application such as this. 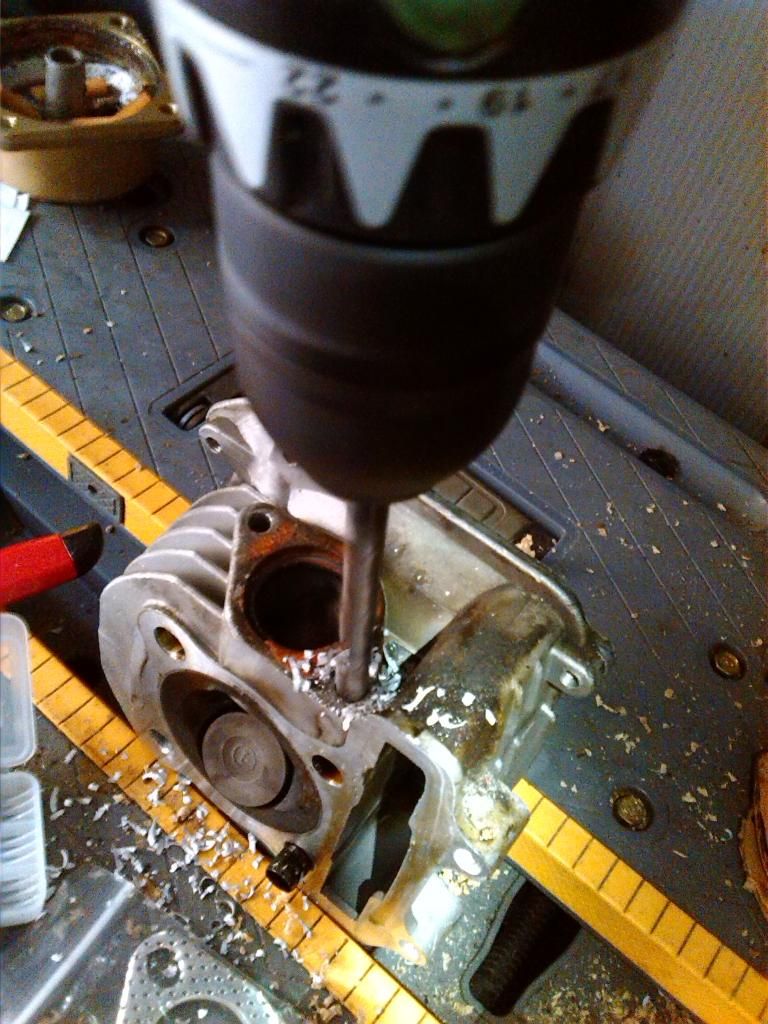 The next step will be to tap out the hole for the insert. It is possible to do this without an entire tap set, but the holes will need to be drilled deeper for tap clearance. I will usually tap a little ways, then screw in the insert to test how deep it sets, if its not deep enough I retap the hole a little deeper and check until desired height is achieved. Picture shows checking the insert set height. Use thread lock compound for final install. 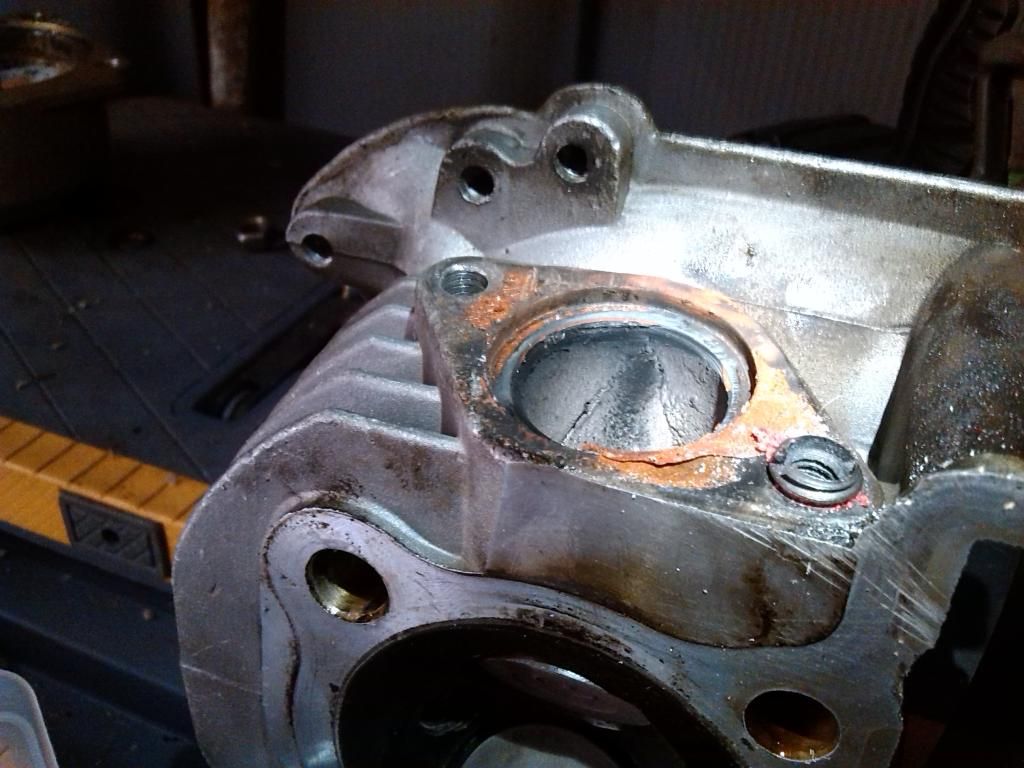 Once the inserts are in and set you can grind/sand off anything above the mating surface that would interfere with good contact. I cannot stress this enough, CLEAN THE PART VERY WELL before replacing it in the engine. Aluminum shavings do NOT belong in an engine. Also make sure to use a new head gasket, these are not meant to be reusable. 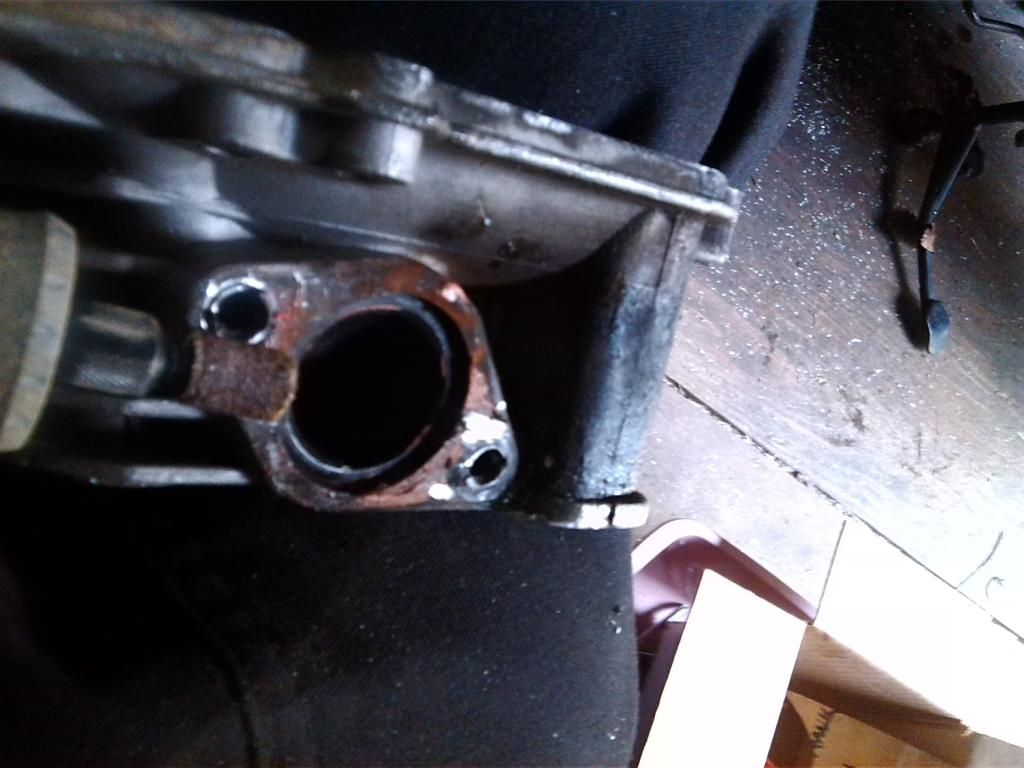 This technique for fixing/improving bolt holes on these scooters can be applied almost anywhere. I have used this technique to also fix stripped head bolt holes. 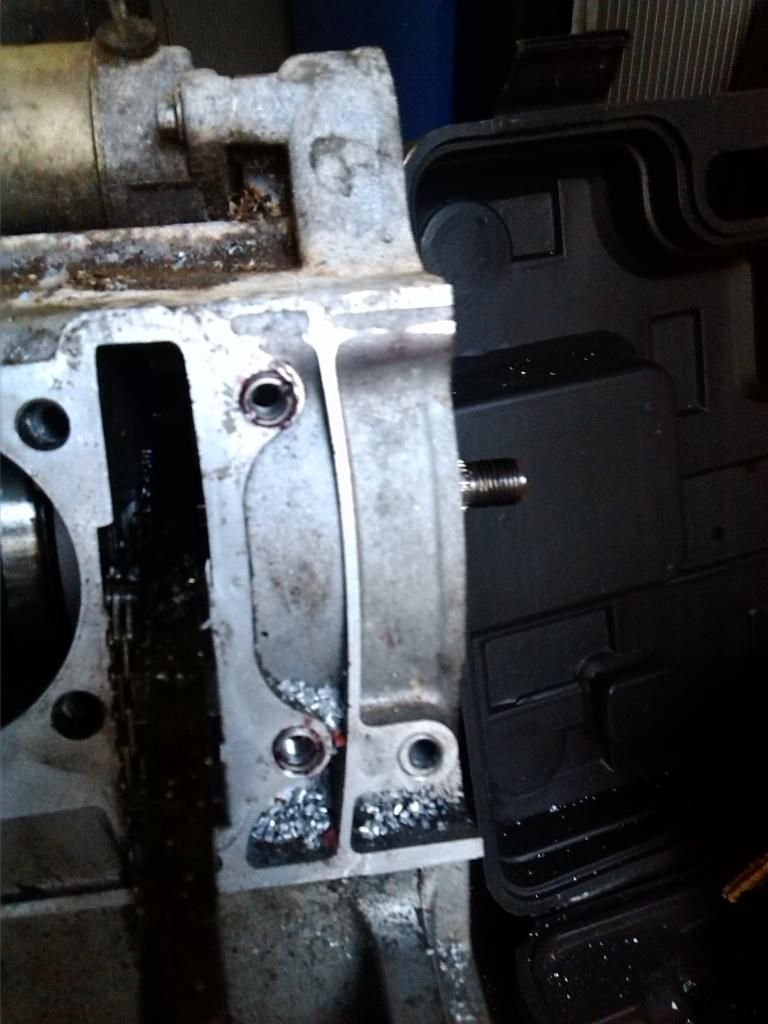 |
|
|
|
Post by toddmaples on Nov 1, 2014 12:10:43 GMT -5
Add at least 2 hours over the bbk you have to split the case. Alleyoop Thanks for the info. My stud spacing is indeed 3.25", so I should be able to go to a 62 or 63mm bore without crankcase machining? This head does seem larger than a standard gy6 head in terms of flow capacity so I think I'll keep it and my stock cam, and get a stroker crank, bbk, Carb and exhaust. |
|
|
|
Post by toddmaples on Oct 31, 2014 13:15:20 GMT -5
the only place i see that is possible is the front storage compartment,just two screws ,but don't know if this is the part to take out or not,up front where head light is ,there's a cage covering the lights but ive taken the screws out ,and two screws coming from the front of that panel and it still does not come loose.....maybe your recommendation of picture will help ,i don't know,,,thanks for your help... You have dual headlights inside the front of the bike, NOT on the handlebars? Remove the panel these lights are Mounted to. If your lights ARE in the handlebar assembly, look underneath the handlebar assembly for a panel that is kinda large. It clips to the other plastic as well as being screwed in place. All of this it referenced looking at the front of thebike not From the seat. |
|
|
|
Post by toddmaples on Oct 31, 2014 11:29:29 GMT -5
i think i found the culprit,when checking the bike ,i noticed while sitting on it i grabbed the handle bars as if to ride it and push them forward and there is about a 1/2 inch movement,but i don't know how to get excess to these two nuts that are there that i have to tighten,,any suggestions ? Look under the "hood" up front. Should just be a couple screws on the front cover and a couple coming through to the back of it from near the bottom of the steering column. If you still can't find em, I have an atm50-a1 I can take pix and highlight where the bolts are. |
|

