Znen ZN150T-18 Scooter Tips and Mods
by: scooter150cc - Jul 25, 2013 20:55:31 GMT -5
m0t0g0th likes this
Post by scooter150cc on Jul 25, 2013 20:55:31 GMT -5
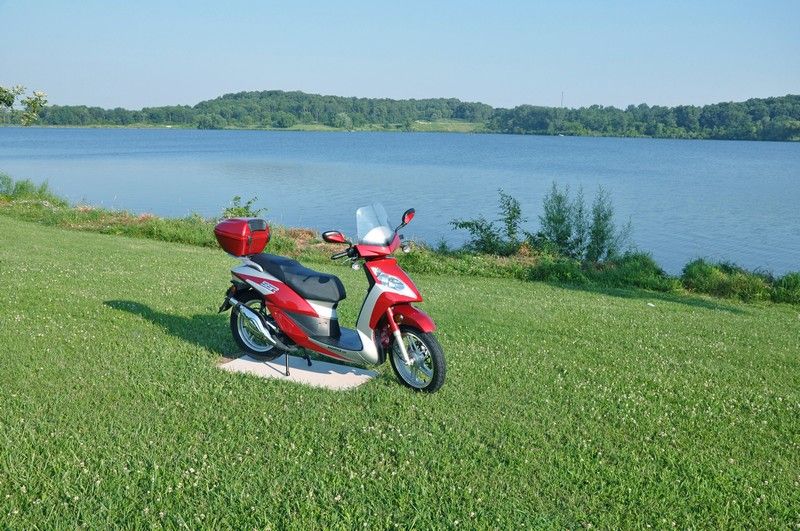
I put the model number in the title because the ZN150T-18 150cc scooter with GY6 BN157QMJ-3 engine could be found on the market under many different names. To the best of my knowledge they are:
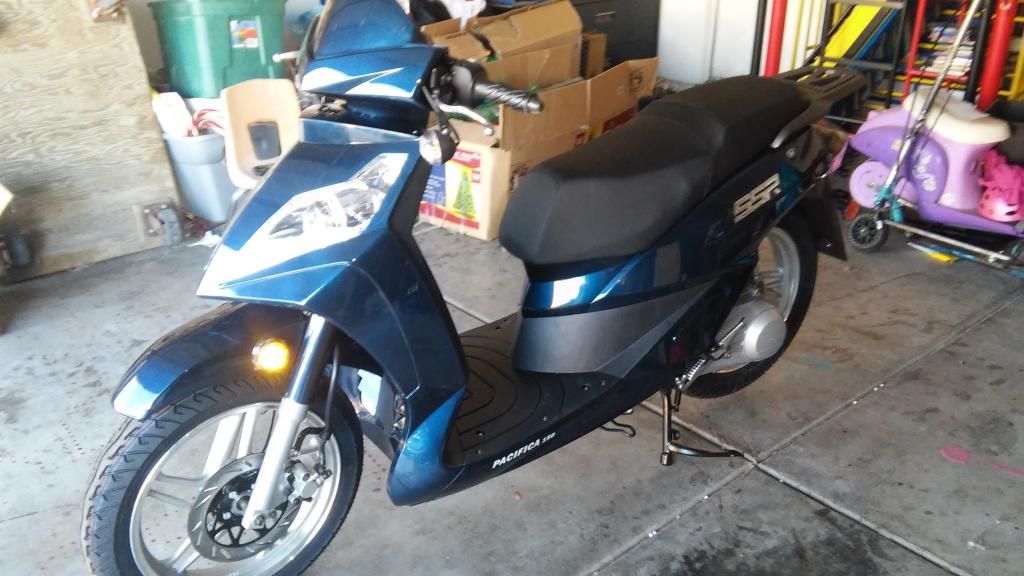
SSR Pacifica 150
Kerrigan
Lance Phoenix
Fly Cadenza
Xingyue ITA-150
Motorino Cassini
CMS Prodigy
S Zoom Scooter
KMD MC-05 150
The following are tips, mods, and improvements I implemented to my new SSR Pacifica 150. I did not describe such obvious and must TBDs on the new Chinese scooters like changing engine oil, gear oil, brake fluid, checking all screws, bolts, electrical connectors, etc.
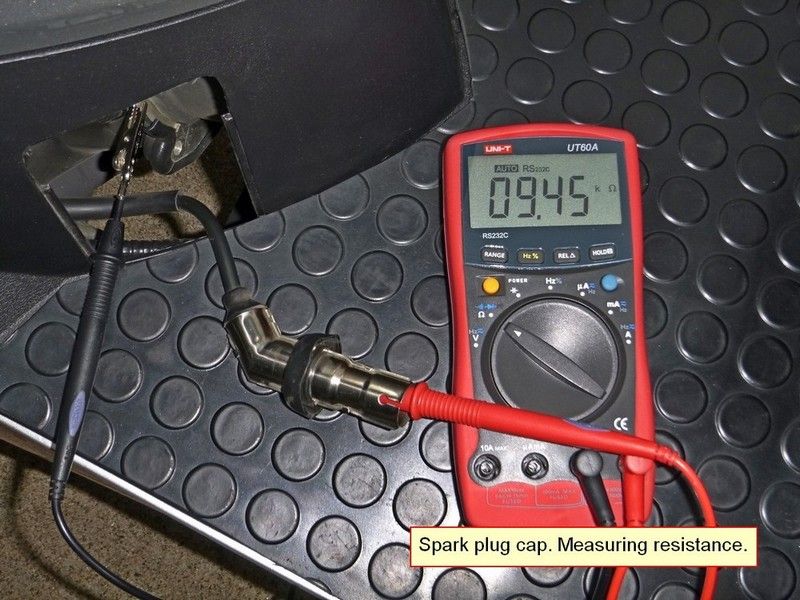
1. Spark plug. Make sure you have installed the proper one. The common mistake is using dual resistors in the spark plug and in the cap. That causes the voltage on the secondary ignition coil to double above the normal and leads to failures. Make the following simple test on order to check what type of the spark plug should be installed. Remove the cap from the spark plug and measure resistance between the cap connector and engine body. If the readings are 6-10 kOhm than the spark plug should be non-resistor type (NGK C7HSA or equivalent). Resistor type cap is marked "5 kΩ" as well.
2. Tank's opening mods to prevent spills when fill at gas station. It goes without explanation.
Advice: have the tip of the nozzle barely in the tank. Do not hold the trigger all the way, so the gas trickles. Fill tank to bottom of the opening.
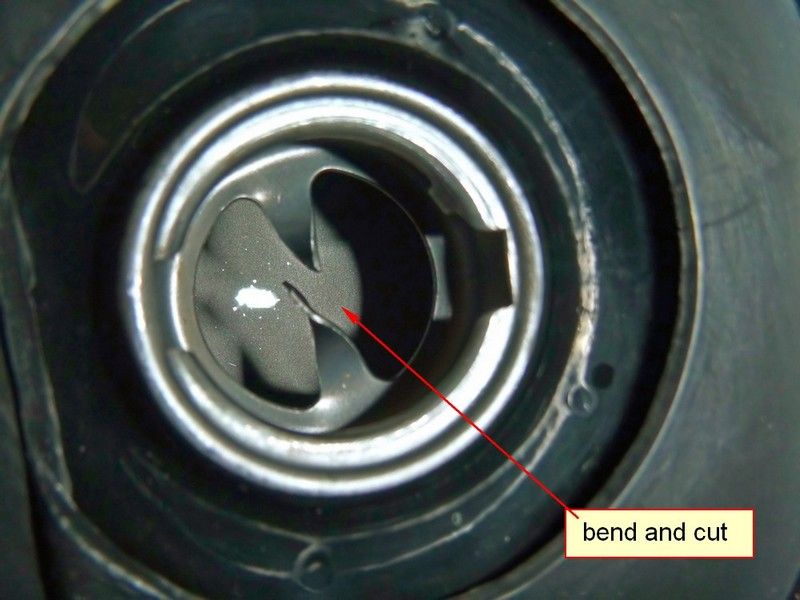
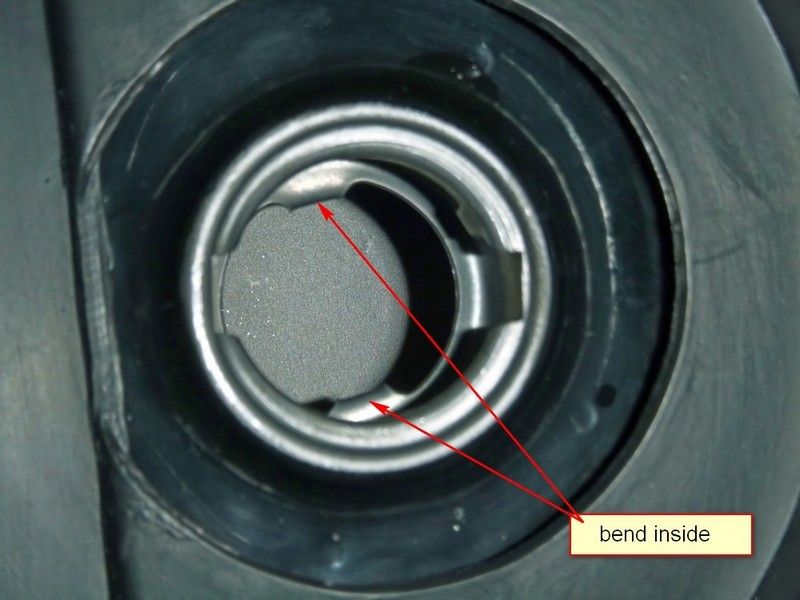
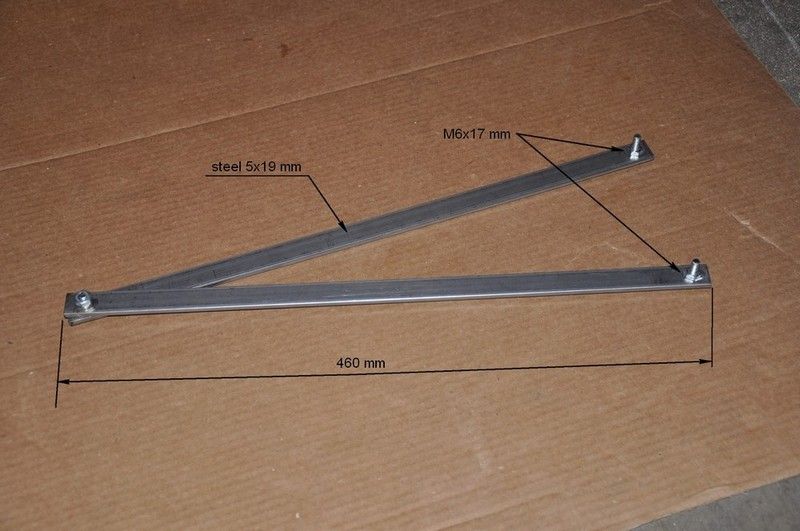
3. Temporary change weights in the variator to 18g for the break in period. That reduces RPM working range to 4000-4500. My factory-installed weights were 12g., size 20x15. One important note: do not even think of using any impact wrench on the variator nut! Use only V-shaped tool. This is how my self-made tool looks like.
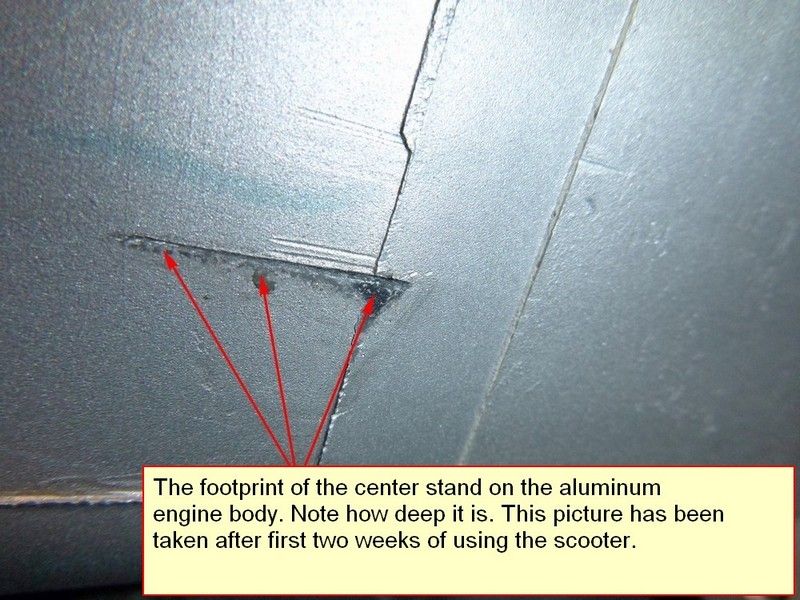
4. Fork kick stand has still–made pad with very sharp front edge. That edge creates substantial impact pressure onto softer aluminum engine body while putting scooter onto stand. I reshaped the pad to match engine surface. Hard aluminum shim installed.
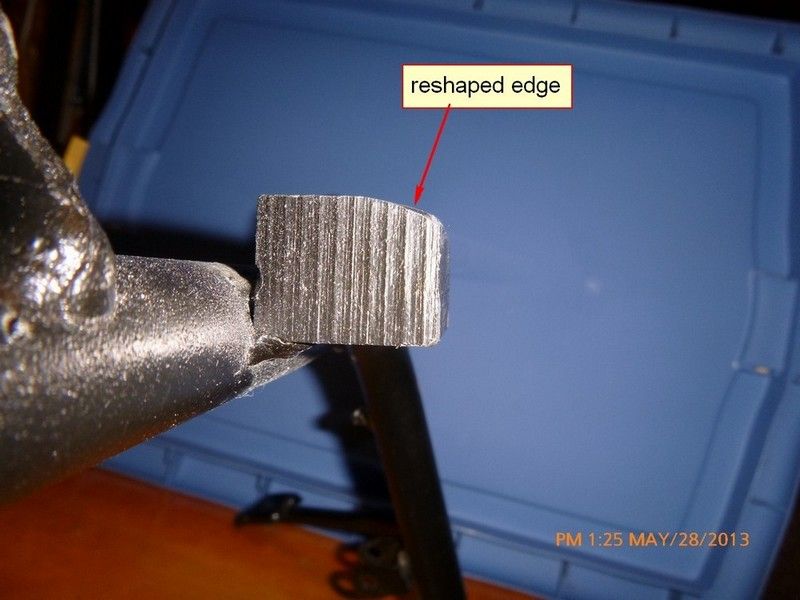
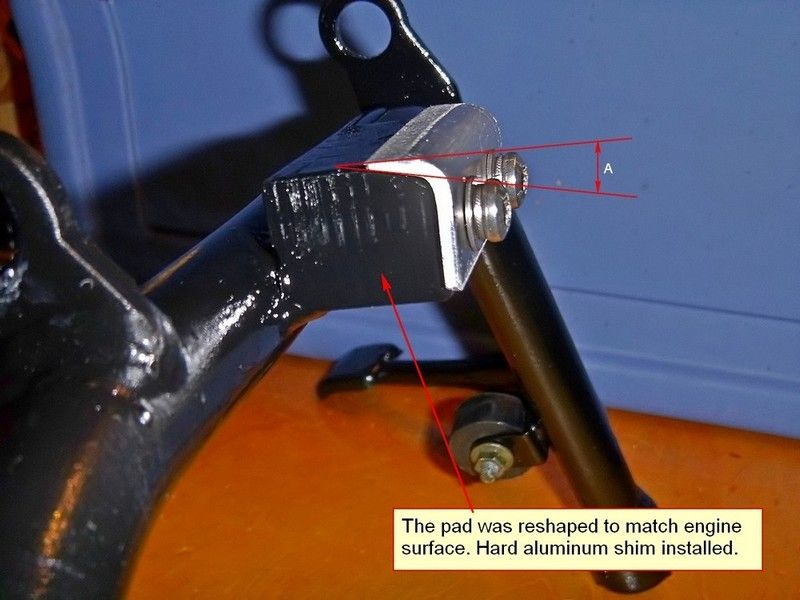
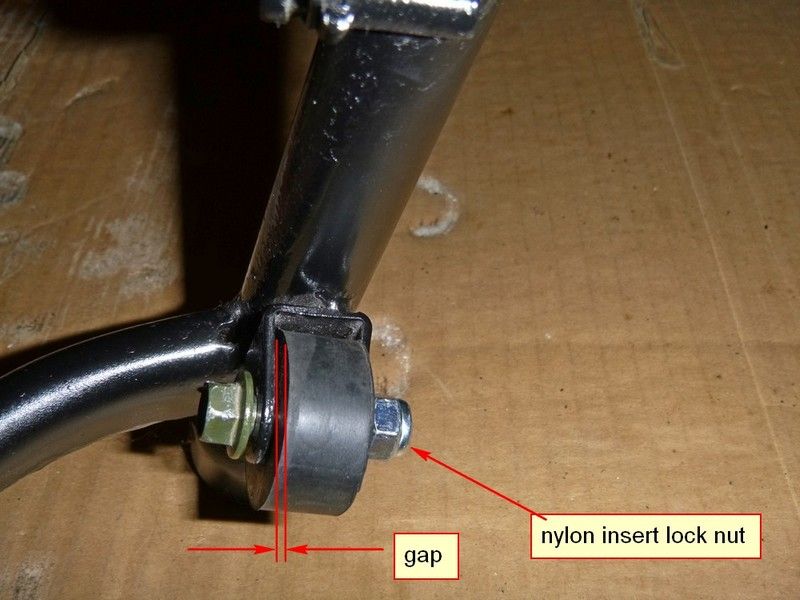
Some time ago the rear suspension began making strange squeaky sounds. As it turned out, the small rubber roller on the left leg of the fork stand did not roll because the nut has been over tighten from the factory. It rubbed the angle bracket on the bottom of CVT housing. Normally it should rolls freely. It is easy to fix. Spread the bracket a little, replace original nut with a nylon one. Tight it just enough to keep a small gap shown.
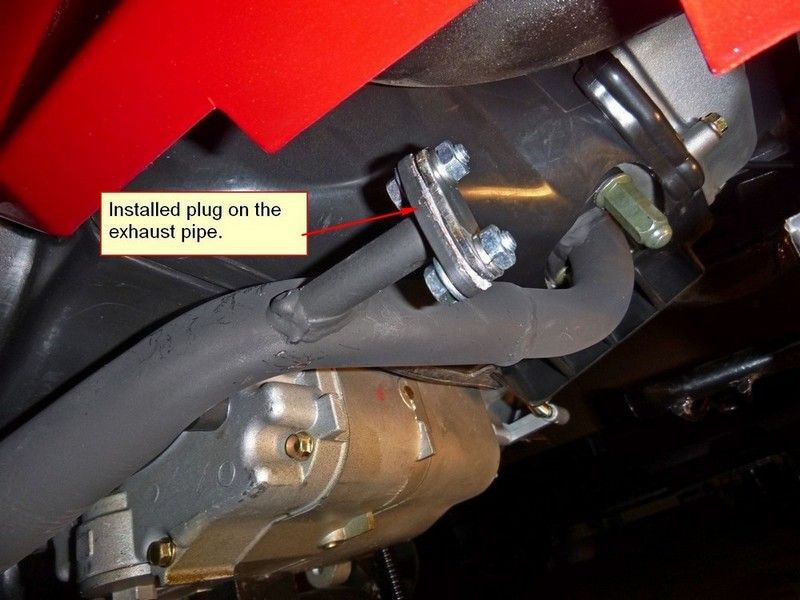
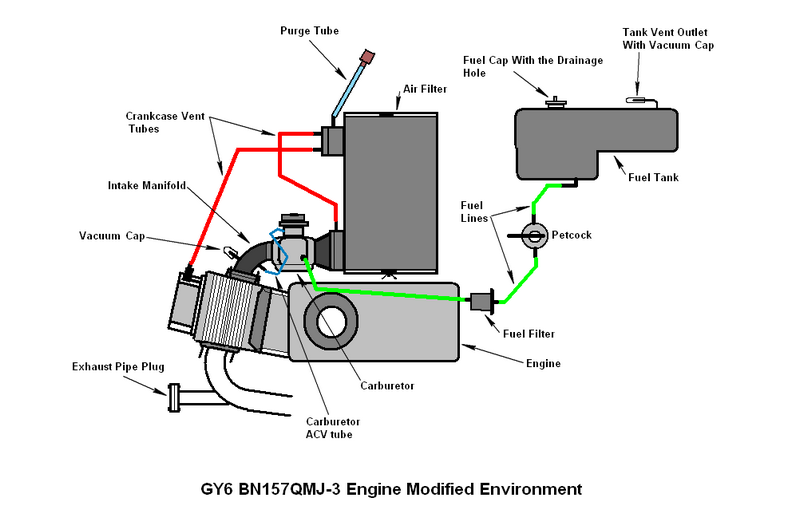
5. Dealing with spaghetti-tube junk surrounding the engine. It causing known major problems many times discussed. Why not remove it completely? Before proceeding, make sure your State law does not require emissions testing. So, let's get rid of the PAIR system. Once it done, install the plug on the exhaust pipe.
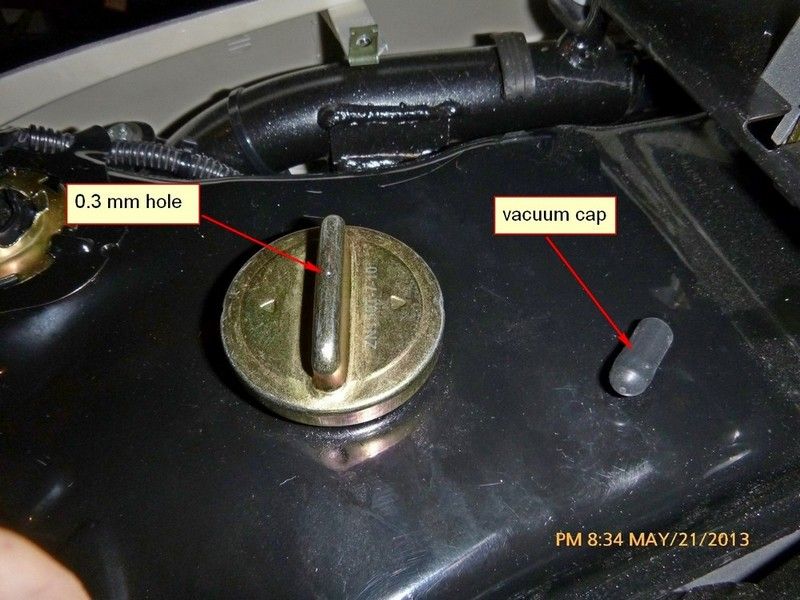
Get rid of the EVAP system, of the vacuum fuel valve, and of the fuel tank breather valve. At this step, we need to provide air drainage into the fuel tank. Drill 0.3 mm hole in the fuel cap. Install vacuum cap onto tank’s vent outlet.
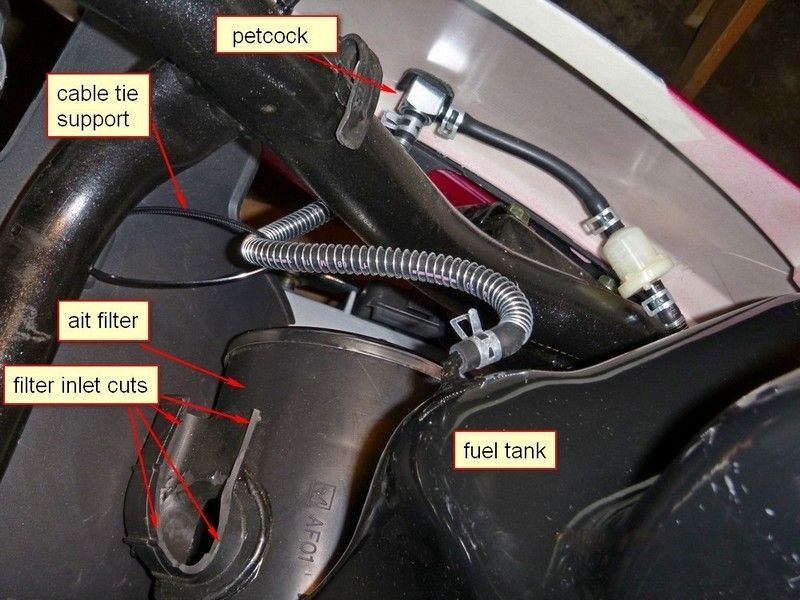
Manual petcock installed. Pay attention to how the fuel line has been routed around the air filter. A long enough cable tie supports the fuel line slightly above the air filter in a normal position and parallel to it. It prevents dropping fuel line between the filter and rear fender. I will talk about that later on.
This is the diagram how reconfigured engine environment looks like:
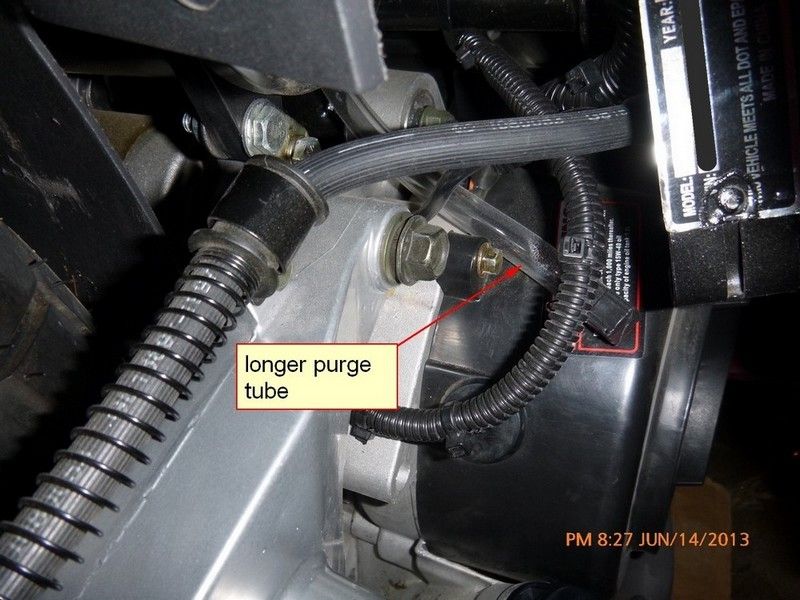
6. Purge tube replaced with a longer one.
7. Using Prima Magnetic Oil Drain Kit.
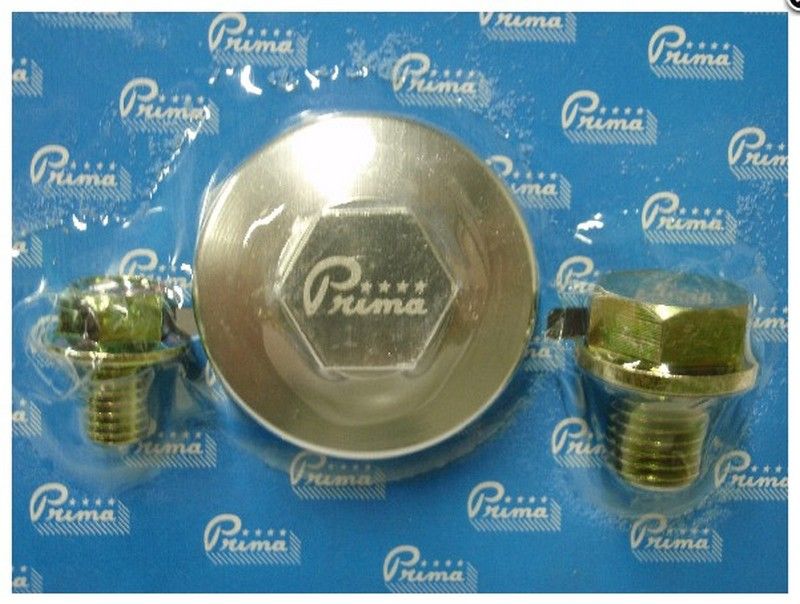
After unpacking, I touched the engine oil drain bolt with the gear bolt. Surprise! The magnet has gone from the engine bolt being stuck to the gear bolt! Seems it was not affixed to the bolt at all. Imagine now what would happen if the magnet dropped inside the working engine? In order to make it safe to use I round-punched the magnet as on the picture. Unfortunately other items from that kit are just garbage. The large filter drain plug simply does not fit because of the thick magnet. It damaged my oil filter and I managed to by a new one. Gear drain bolt is too short. So, only the engine bolt with the mods described above is usable. Does it worth $18?
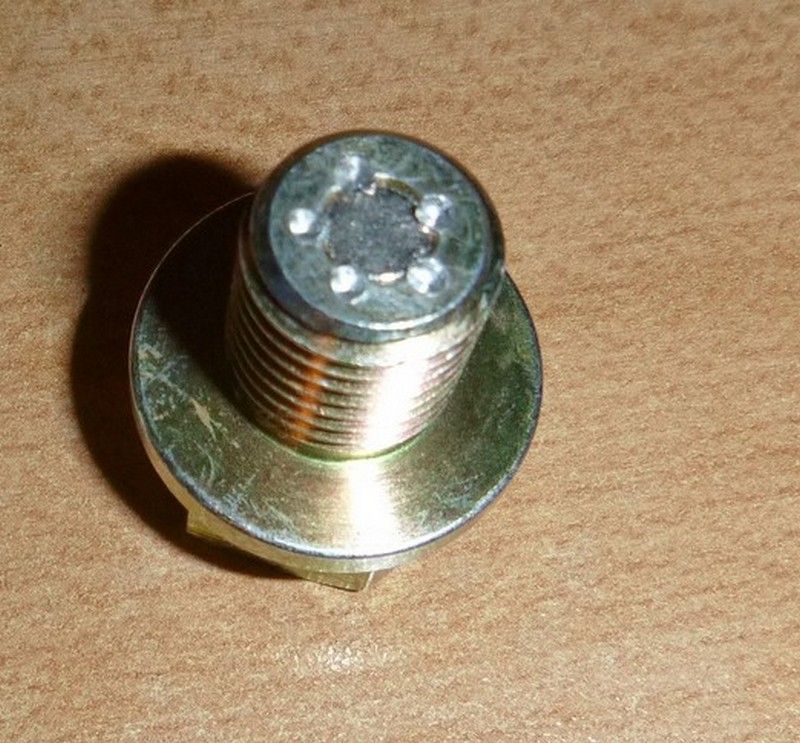
One more note regarding the engine oil drain bolt. The original aluminum washer leaks. I tried copper washer and it leaks too. I heated it up cherry red, but it leaks anyway. Metal-rimmed rubber washer works just fine.
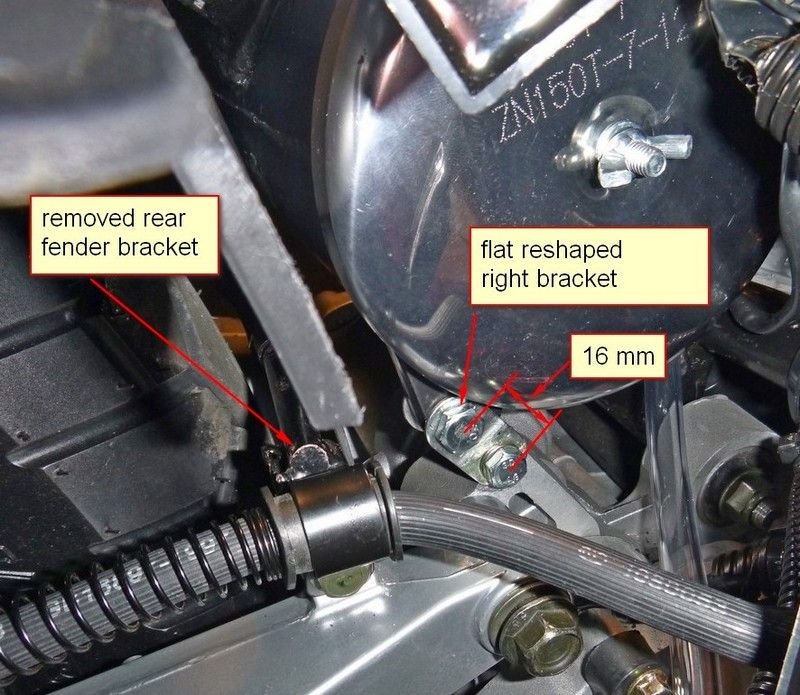
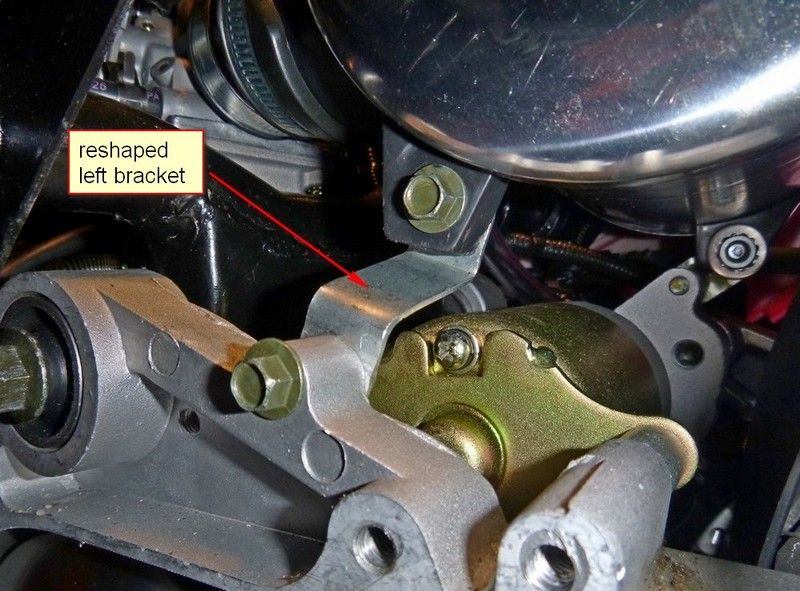
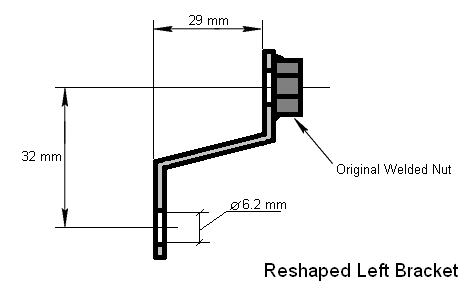
8. Air filter. The issue: it simply does not fit into the designated area, making a mess around. A bunch of vacuum lines, the EVAP lines, the fuel lines – all together are factory routed between movable air filter and the rear fender. It causes the rear fender bent toward the rear wheel and touches it all the time. Wrongly designed left and right brackets of the air filter aggravate this problem, also making very difficult to align properly intake of the air filter. The "ingenious" designer's workaround was to install additional bracket right behind the plastic rear fender. After just 70 miles on my scooter that bracket abraded the rear fender almost to the hole. Another try: we can lift the air filter to make more room for the lines behind, but the filter's body will hit the fuel tank when rear suspension fully engaged to the top. Even after the mods, described in the point 5 with the only one fuel line left, the problem has not gone and the fuel line could drop behind the air filter (see my fix in point 5). One more note. With factory original arrangements, the front side of the rear fender touches movable starter terminal protected just by small plastic cap. On another GY6 models that connector positioned on the top and towards the engine, being protected from dirt, dust, and water. Unfortunately this starter cannot be rotated by 180 deg. because of its design. One more "ingenious" approach? So, to make a story short, after many experiments I found the following solutions:
a). Air filter has been repositioned with completely reshaped left and right brackets.
b). Filter's inlet was cut the way shown on the picture.
c). A cable tie support added to the fuel line (see p.5)
d). Rear fender bracket has been removed.
e). Starter motor's electrical connector was wrapped with the tape and a small cable ties.
Now the pictures with comments.

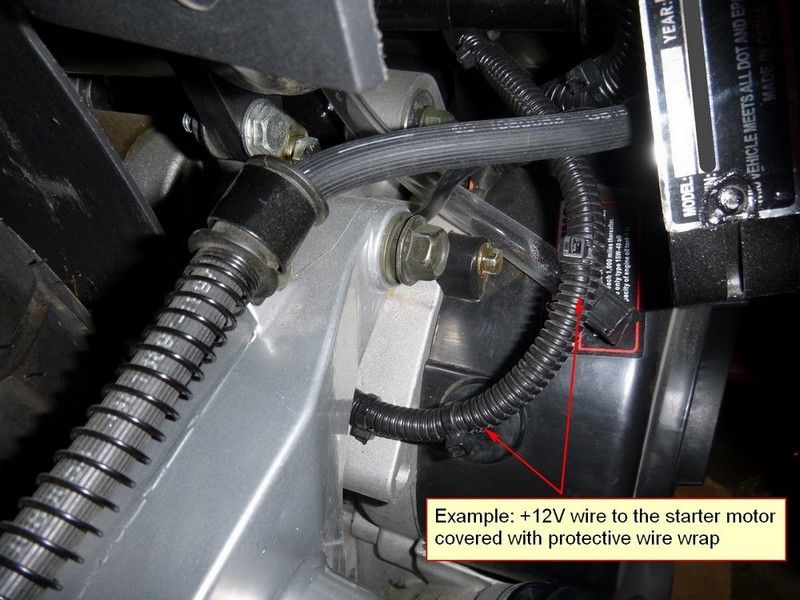
9. Cover all electrical cables wherever possible with protective wire wrap.
10. The lights. The front of the scooter is like a Christmas tree: five lights when it runs. Low beam assembly with its original H3 55W bulb is ON all the time. Because of the poor design, its plastic body gets hot, very hot, especially in the summer. Measured with infrared thermometer, the temperatures go up to 75-
 degC in the proximity to the bulb area. Next, the 10W amber turn lights are barely visible on a sunny day. Also it is not clear enough the purpose of using two 5W lights located above high/low beams. Looks like initial idea was to use them as a turn lights? Now they are ON at all times. In addition, each of the headlight assemblies has one 5W bulb already installed as a side marker lights, they are ON at all times as well. All that bulbs draw the battery while starting engine (except the low beam). Back to low beam now. Of course, we can use the modulator to decrease low beam intensity (temperatures) during daytime, but it does not work with AC. I decided to take another approach.
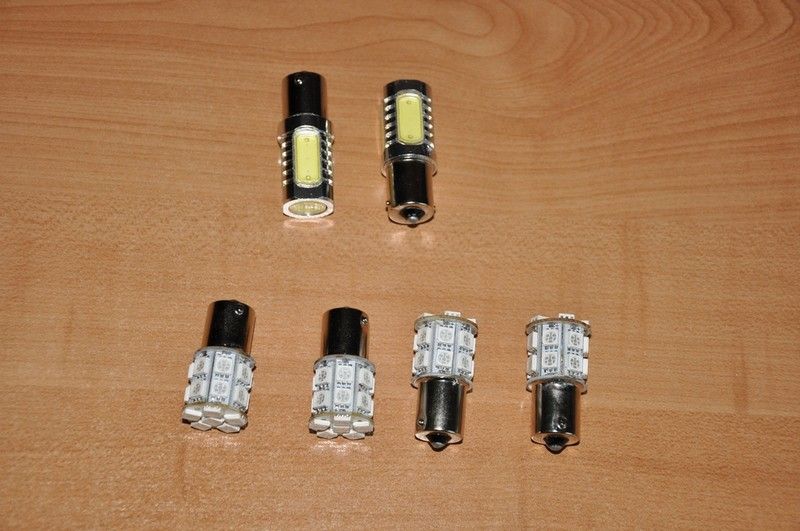
 1. Two top 5W light bulbs have been replaced with 7.5W LED bulbs. Now they serve as DRL. One important note: do not use LEDs with forward facing focusing lens. They will blind other drivers at night.
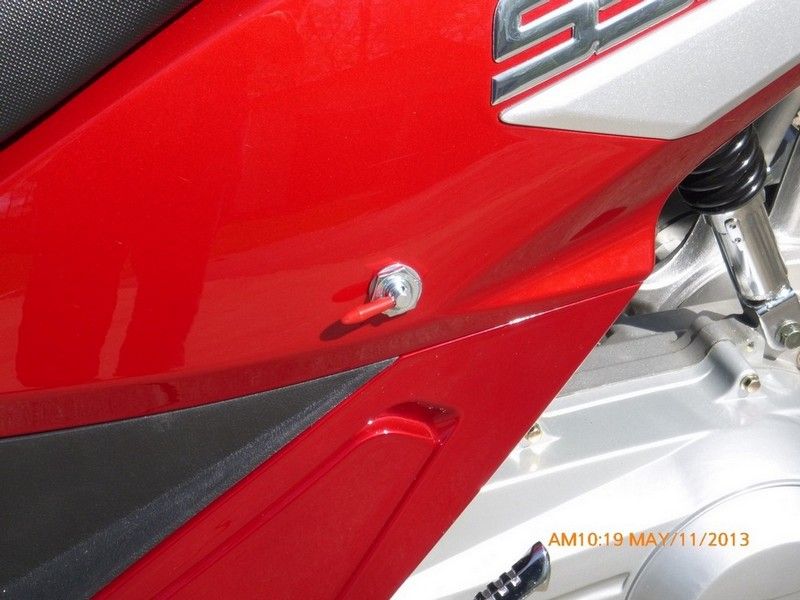
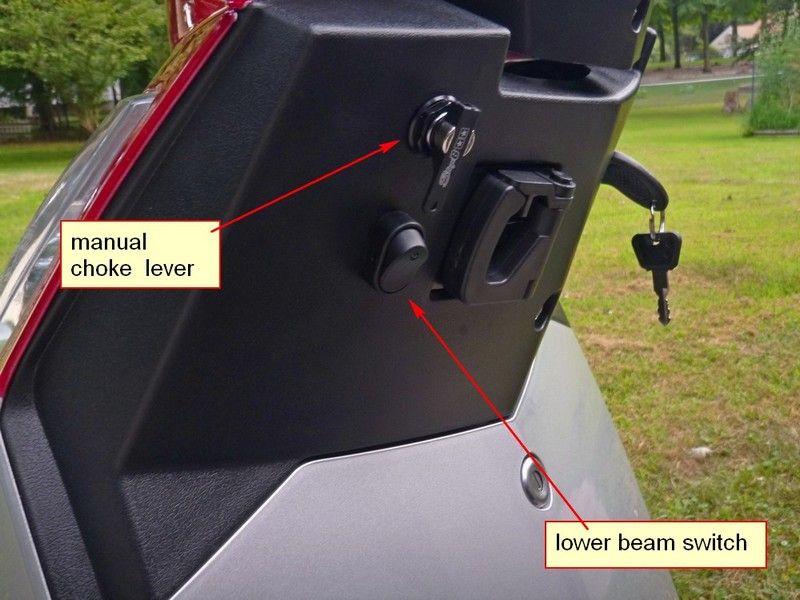
2. Added headlight low beam switch installed on the front panel (see the picture). Now low beam could be turned ON/OFF independently at the daytime or at night.
3. Turn light bulbs were replaced with amber LED bulbs. LED have brighter and more "sharper" flashing.
4. Remove 5W bulbs from the headlight assemblies.
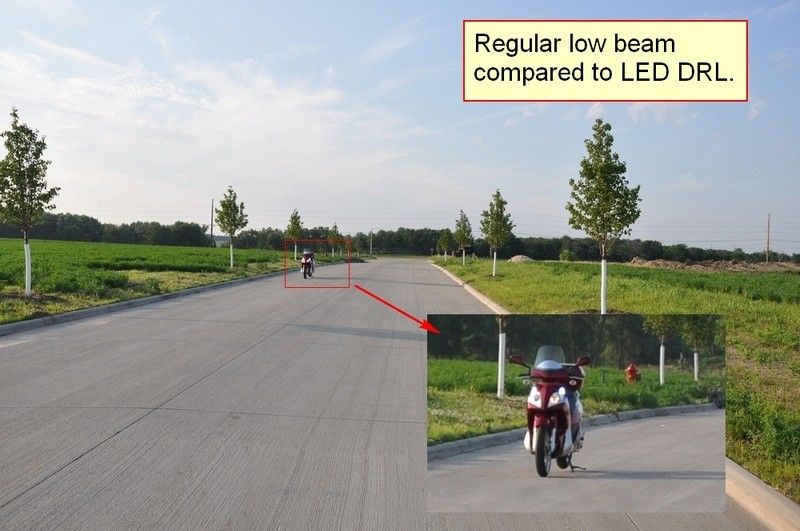
New LED DRL bulbs draw 290 mA each whereas old incandescent 5W bulbs drew 350mA each. However, when we go to compare ... take a look at the following picture.
Regular low beam compared to LED DRL. Do you see the difference? I do.
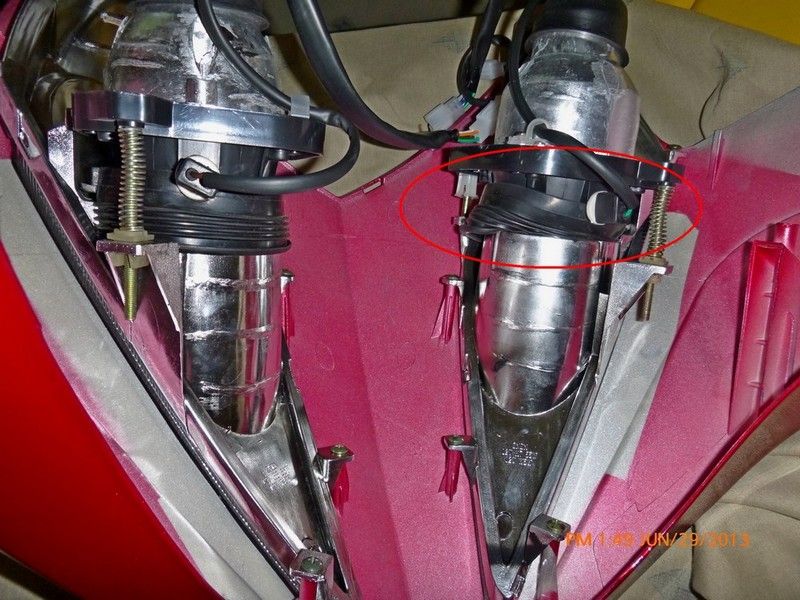
Wrongly factory-installed protective shield.
Independent lower beam headlight switch. Panel installation.
Replacement LED bulbs. It cost me just $34.80 all together with free shipping.
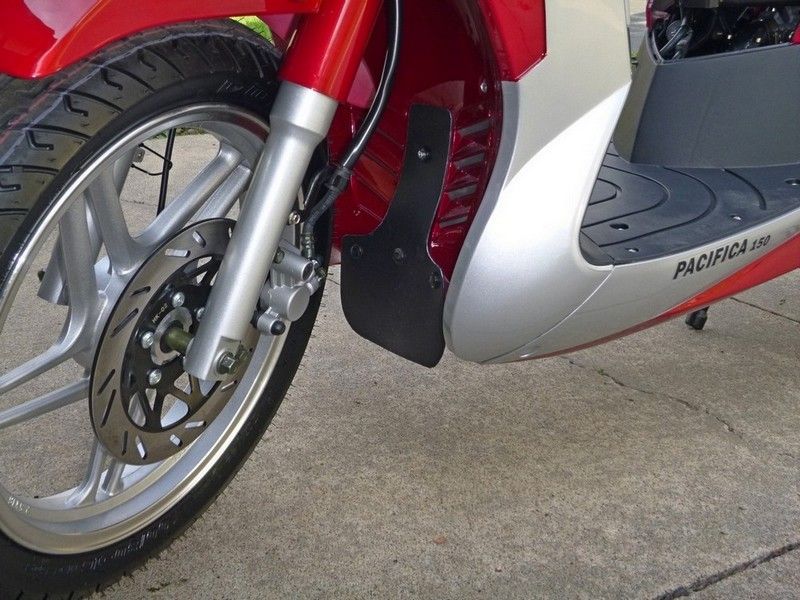
11. Front wheel mudguard. Why do we need it? Besides its primary purpose to protect against the mud, it also bounces nails, screws, lifted by the front wheel back to the road before they get thrown under the rear wheel and punch one.
12. Installed electrolyte absorbing belt on the battery and self-made plastic pan. Both protect from possible electrolyte spills.
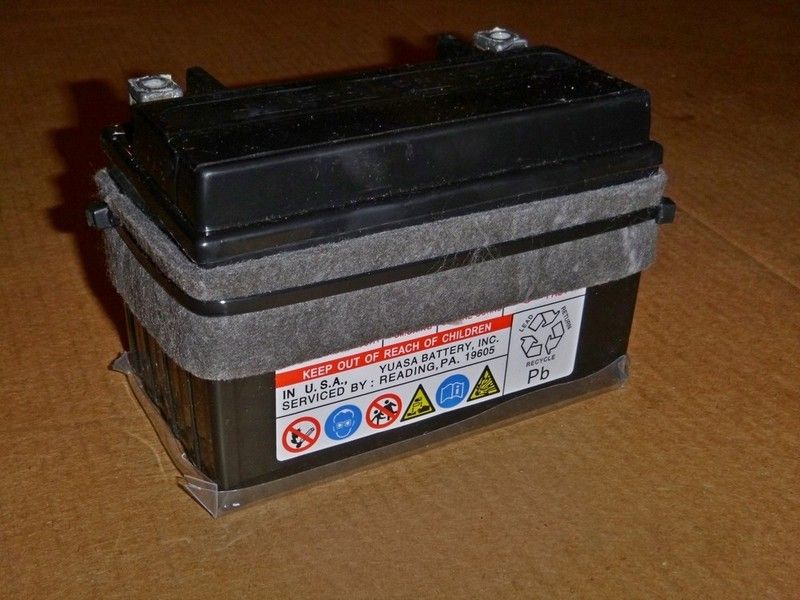
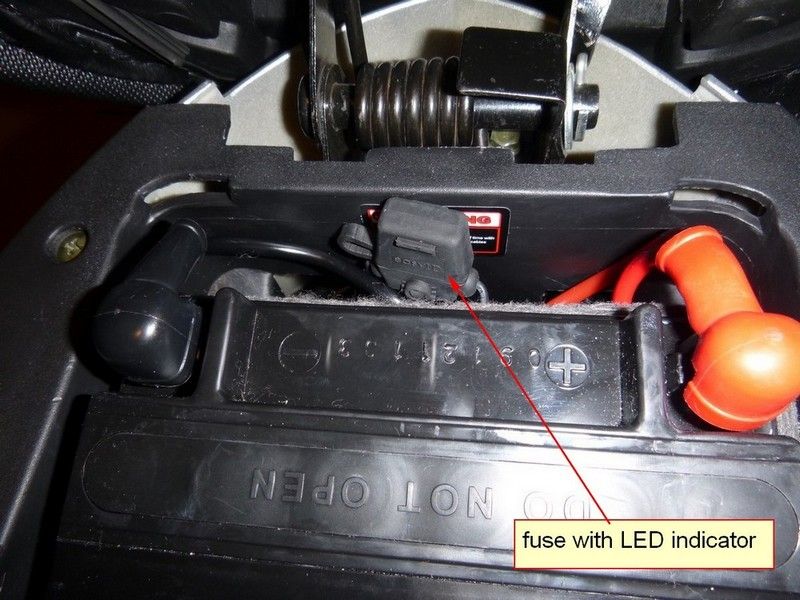
13. More practical fuse with LED indicator installed.
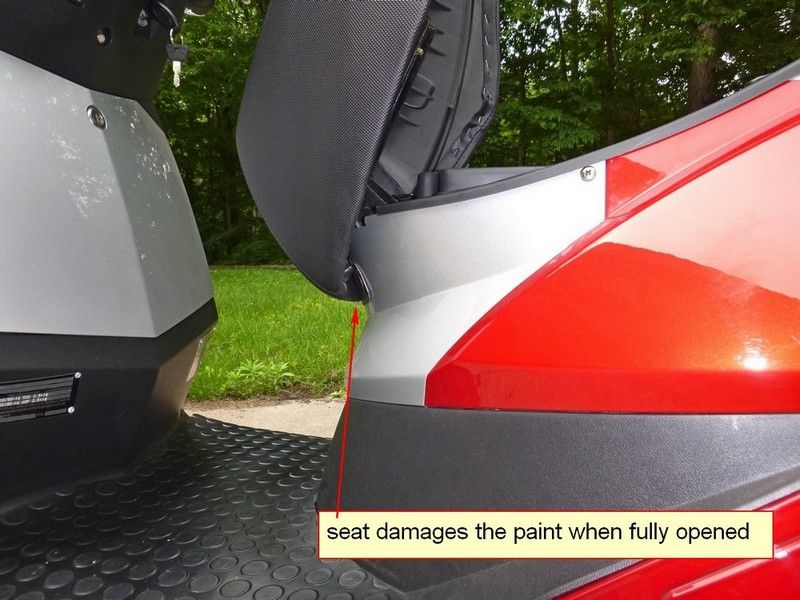
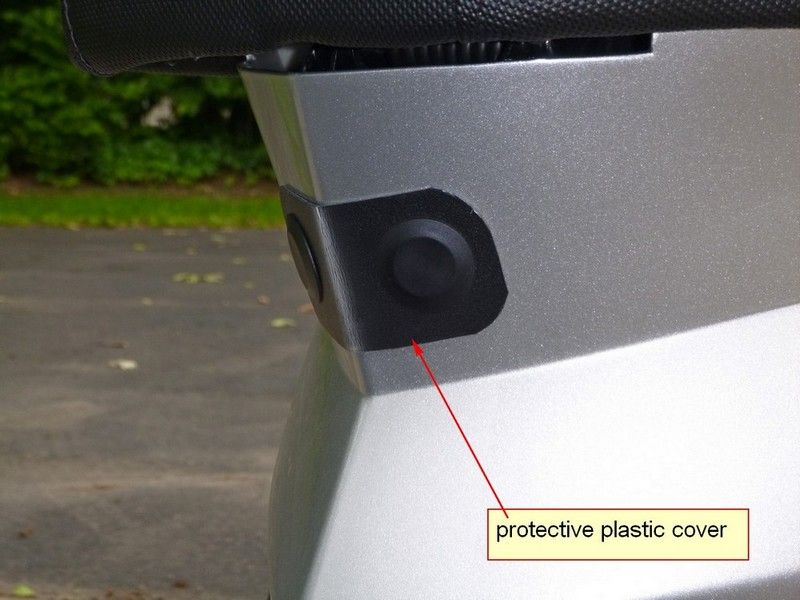
14. Protective plastic cover installed on the front panel, because the paint has been damaged by fully opened seat.
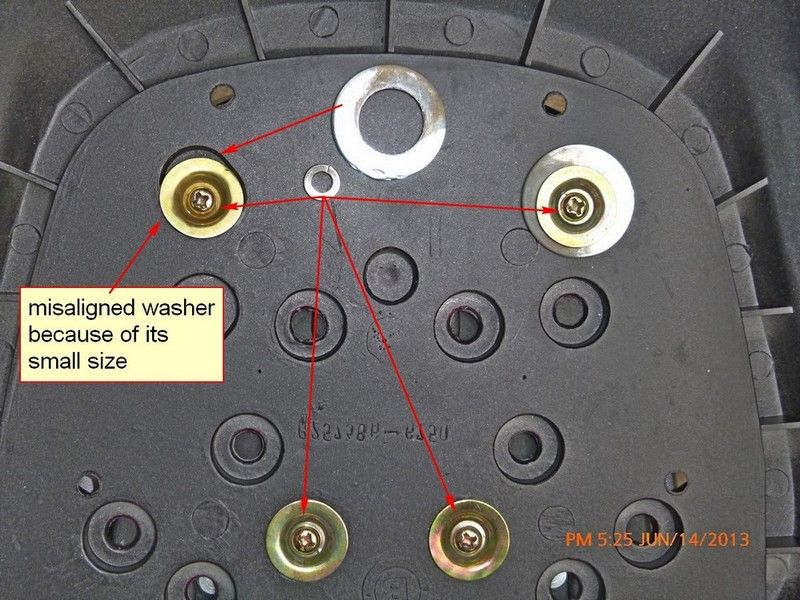
15. In order to fix trunk box rumbles, larger diameter extra washers installed under the original one. The picture shows why.
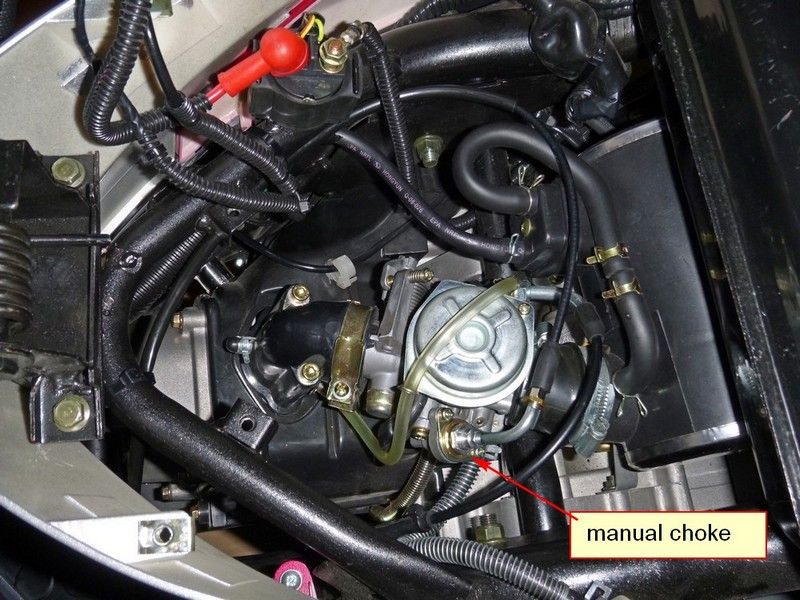
16. Installed manual choke. See the pictures.

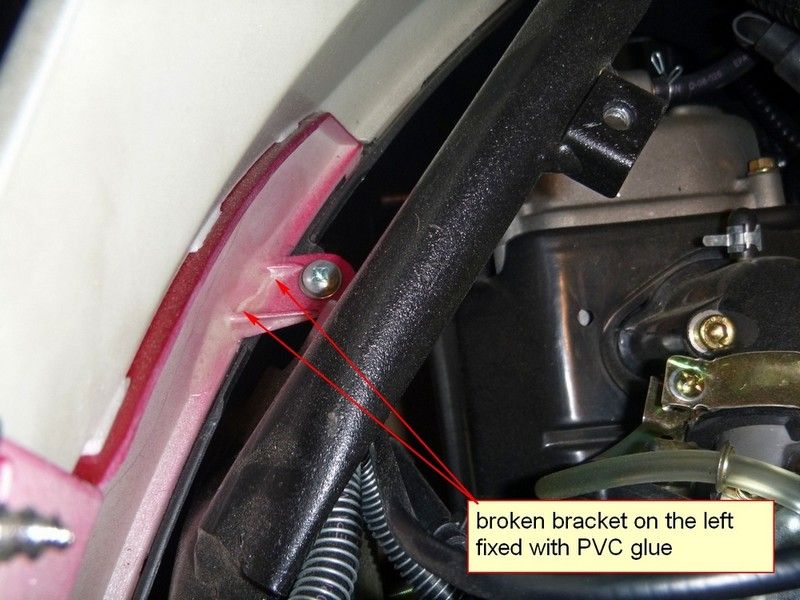
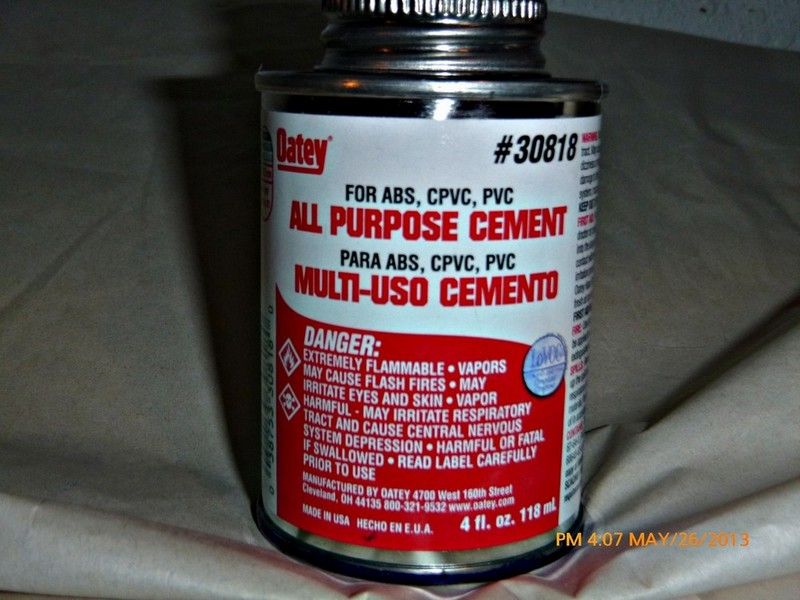
17. The front brackets on the left and right plastic panels had been broken from the factory. Fixed with PVC glue. This glue works really well on that type of plastic. Highly recommend it.
18. Cut rubber mat and put it over the slippery plastic floor board.
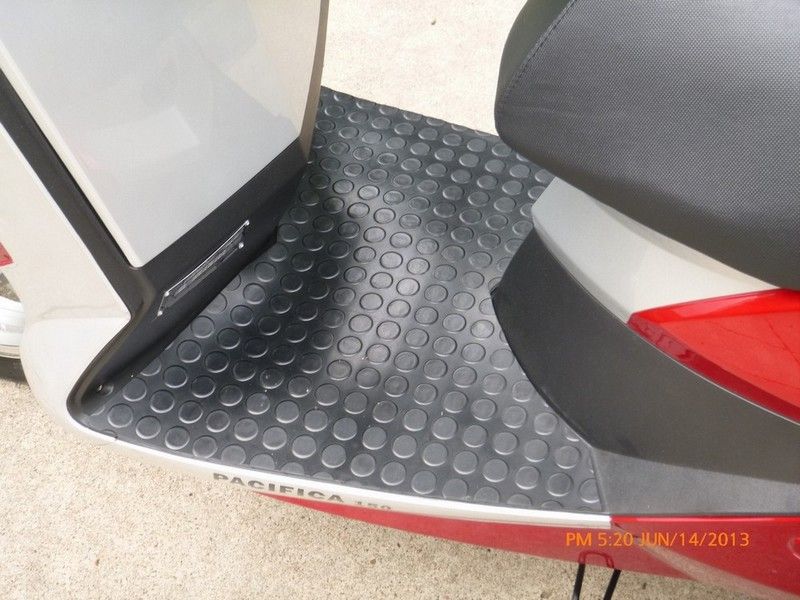
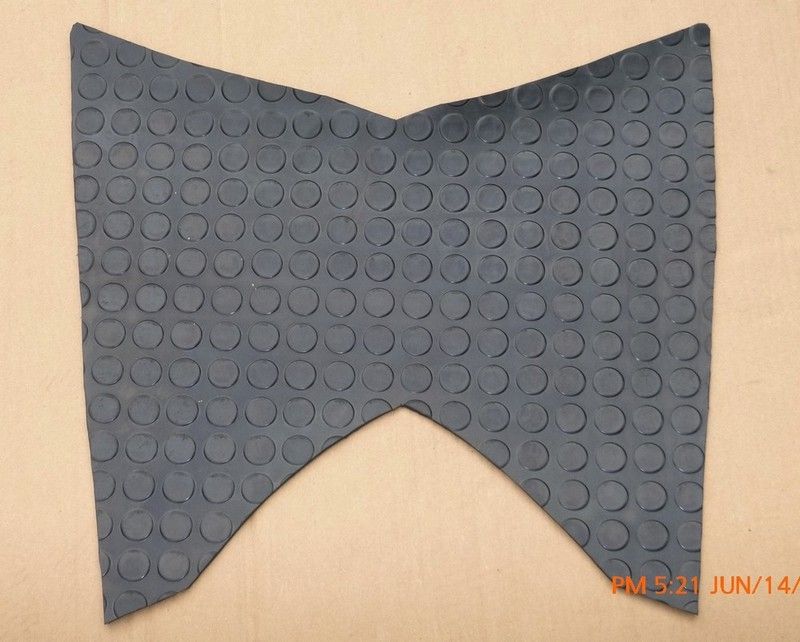
19. Measured battery drain current. This is helpful reference point for possible electrical troubleshooting. Battery is fully charged, all electrical systems of the scooter have no problems, auto choke uninstalled. As you see on the picture it measures 2.27 A with the ignition key in ON position and 2.5 mA in OFF position. The voltage regulator's monitoring circuits and the clock draw that leakage 2.5 mA current because they connected to +12V all the time.
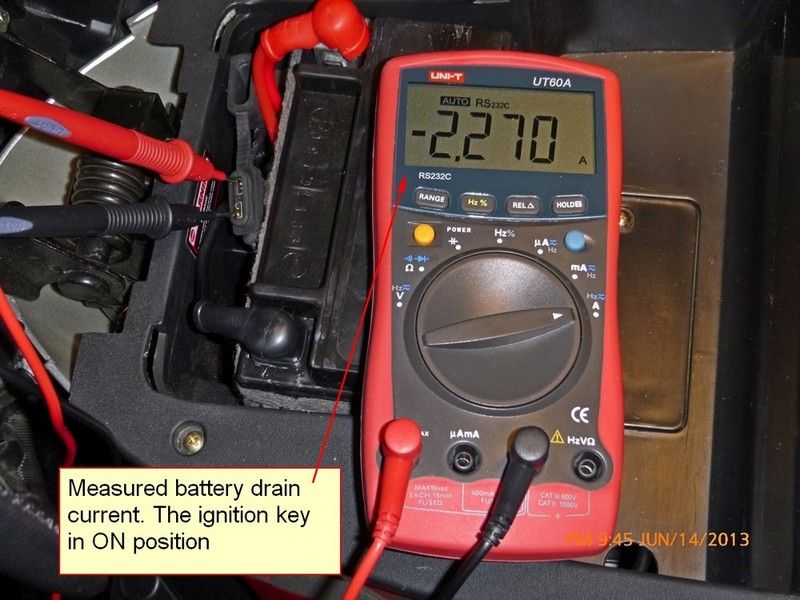
After all mods, described in p.10, the current drops to 1.45A in ON position of the ignition key. If you ever try to start your engine with exhausted battery, that difference would be appreciated.
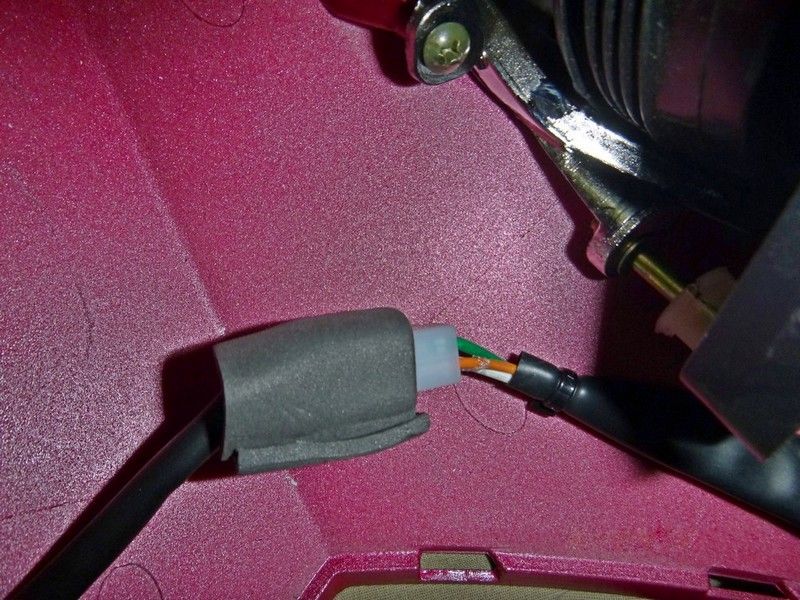
20. Connectors wrapped with adhesive foam to prevent annoying knocking.
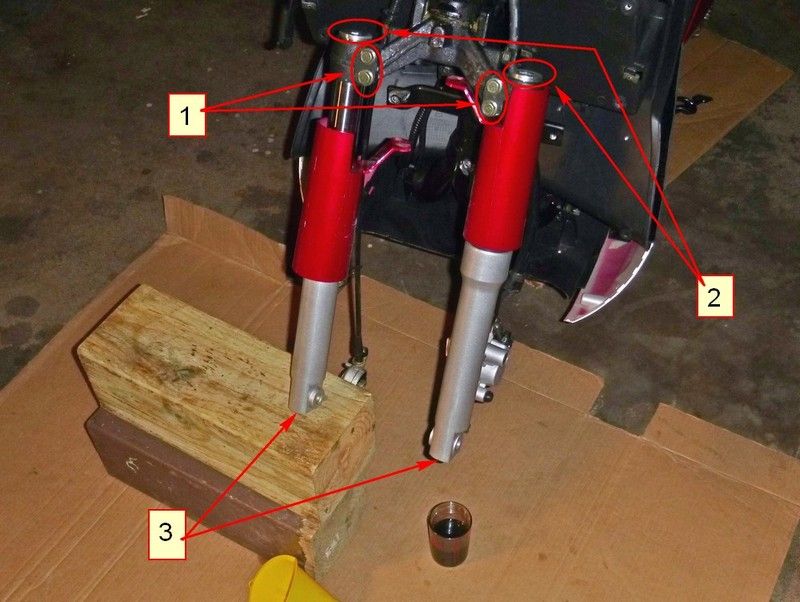
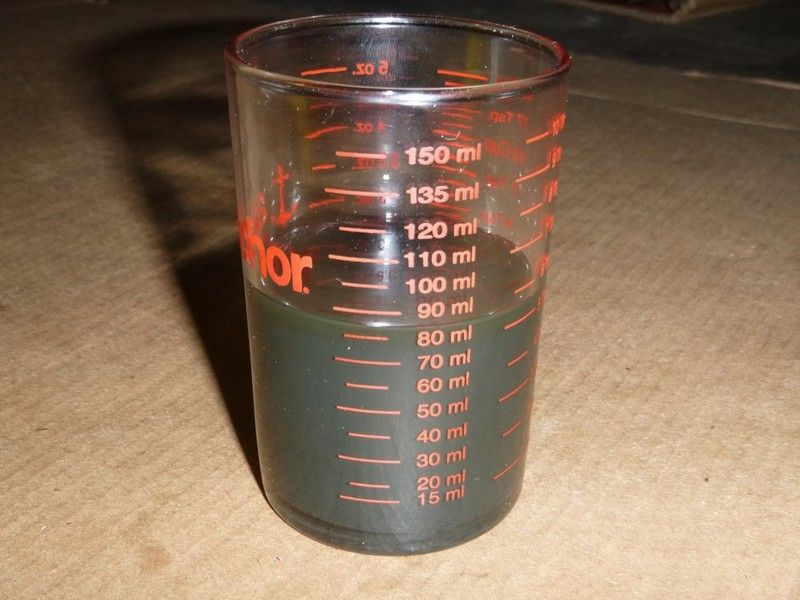
21. Replacing fork oil and how to do it. Remove front wheel, front board and front fender. Do one leg at a time (with the setup shown). Slightly loosen bolts 1, than unscrew cap 2 with 12 mm hex. Be careful, there is a pre-tensioned spring inside. To drain oil, unscrew 6 mm hex rod bolt 3 inside the leg. I was able to drain
 ml from the left leg and 70 ml from the right leg. Note how contaminated the drained oil is. It is almost black after just 650 miles. Fill leg up with a gas then remove the spring. Very slow (to prevent spill from the top) push lower tube upward and downward several times. Drain gas. Repeat this step one more time. Leave leg opened for several minutes to let gas vaporize completely or use pressure air from compressor. Refill with fresh oil. I use Honda Fork Oil SS8-10W, 90ml into each leg as to the manufacturer spec. Before installing the cap, first take a little bit of fork oil and rub it around the rubber gasket of the cap.
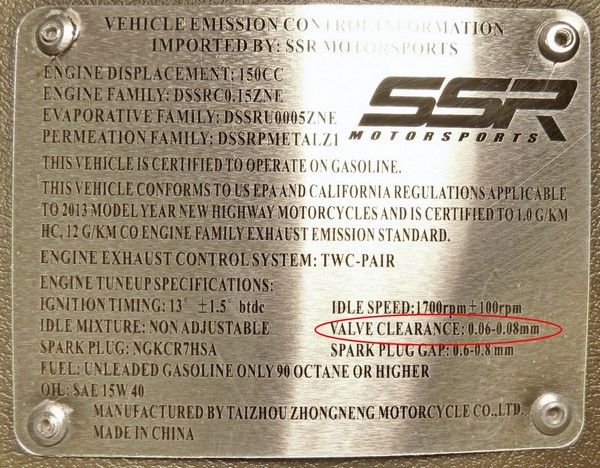
22. One tip for more accurate valves adjustment. For example the gap should be 0.07 mm (BN157QMJ-3 engine). Use two feelers: 0.06 mm and 0.08 mm. Consider adjustments completed if the 0.06 mm feeler is snug but not tight in the gap, whereas the 0.08 mm feeler does not.
23. Odometer accuracy has been verified using mileposts on the distance of 13 miles. Actual reading was 13.6 miles, so the error is +4.6% which is not too bad. Speedometer has been verified with GPS.
Actual readings were:
21 mph at GPS=20 mph (error = +5%)
31 mph at GPS=30 mph (error = +3.3%)
42 mph at GPS=40 mph (error = +5%).
As per manufacturer spec, the tire pressure was: front 25 PSI; rear 32 PSI, temperature 82 F.
Conclusion.
Vespa, Aprilia, Yamaha dealers warned me against buying Chinese scooters online, because they "blow up" engines. Well, a while back I witnessed how one guy blew up his Honda car engine. Should we stop buying Honda because of such total idiots? Summarizing my notes above and considering what people say about Chinese scooters my word would be: "Yes, these scooters are very good and very reliable for the money you pay." If you are a DIY person, it is a lot of fun too.


 ,, Same place I found it three years ago
  ..Duh.


